
The Shine Forms tablet apps will be available soon. Follow us on LinkedIn, watch our blog, or sign up to our newsletter for updates.
Circuits and test results
The Circuits & Tests section is where you record each board’s characteristics and the details and test results of its circuits. Open it from the ribbon: tap the section name or Ribbon, then the Circuits & Tests tab.
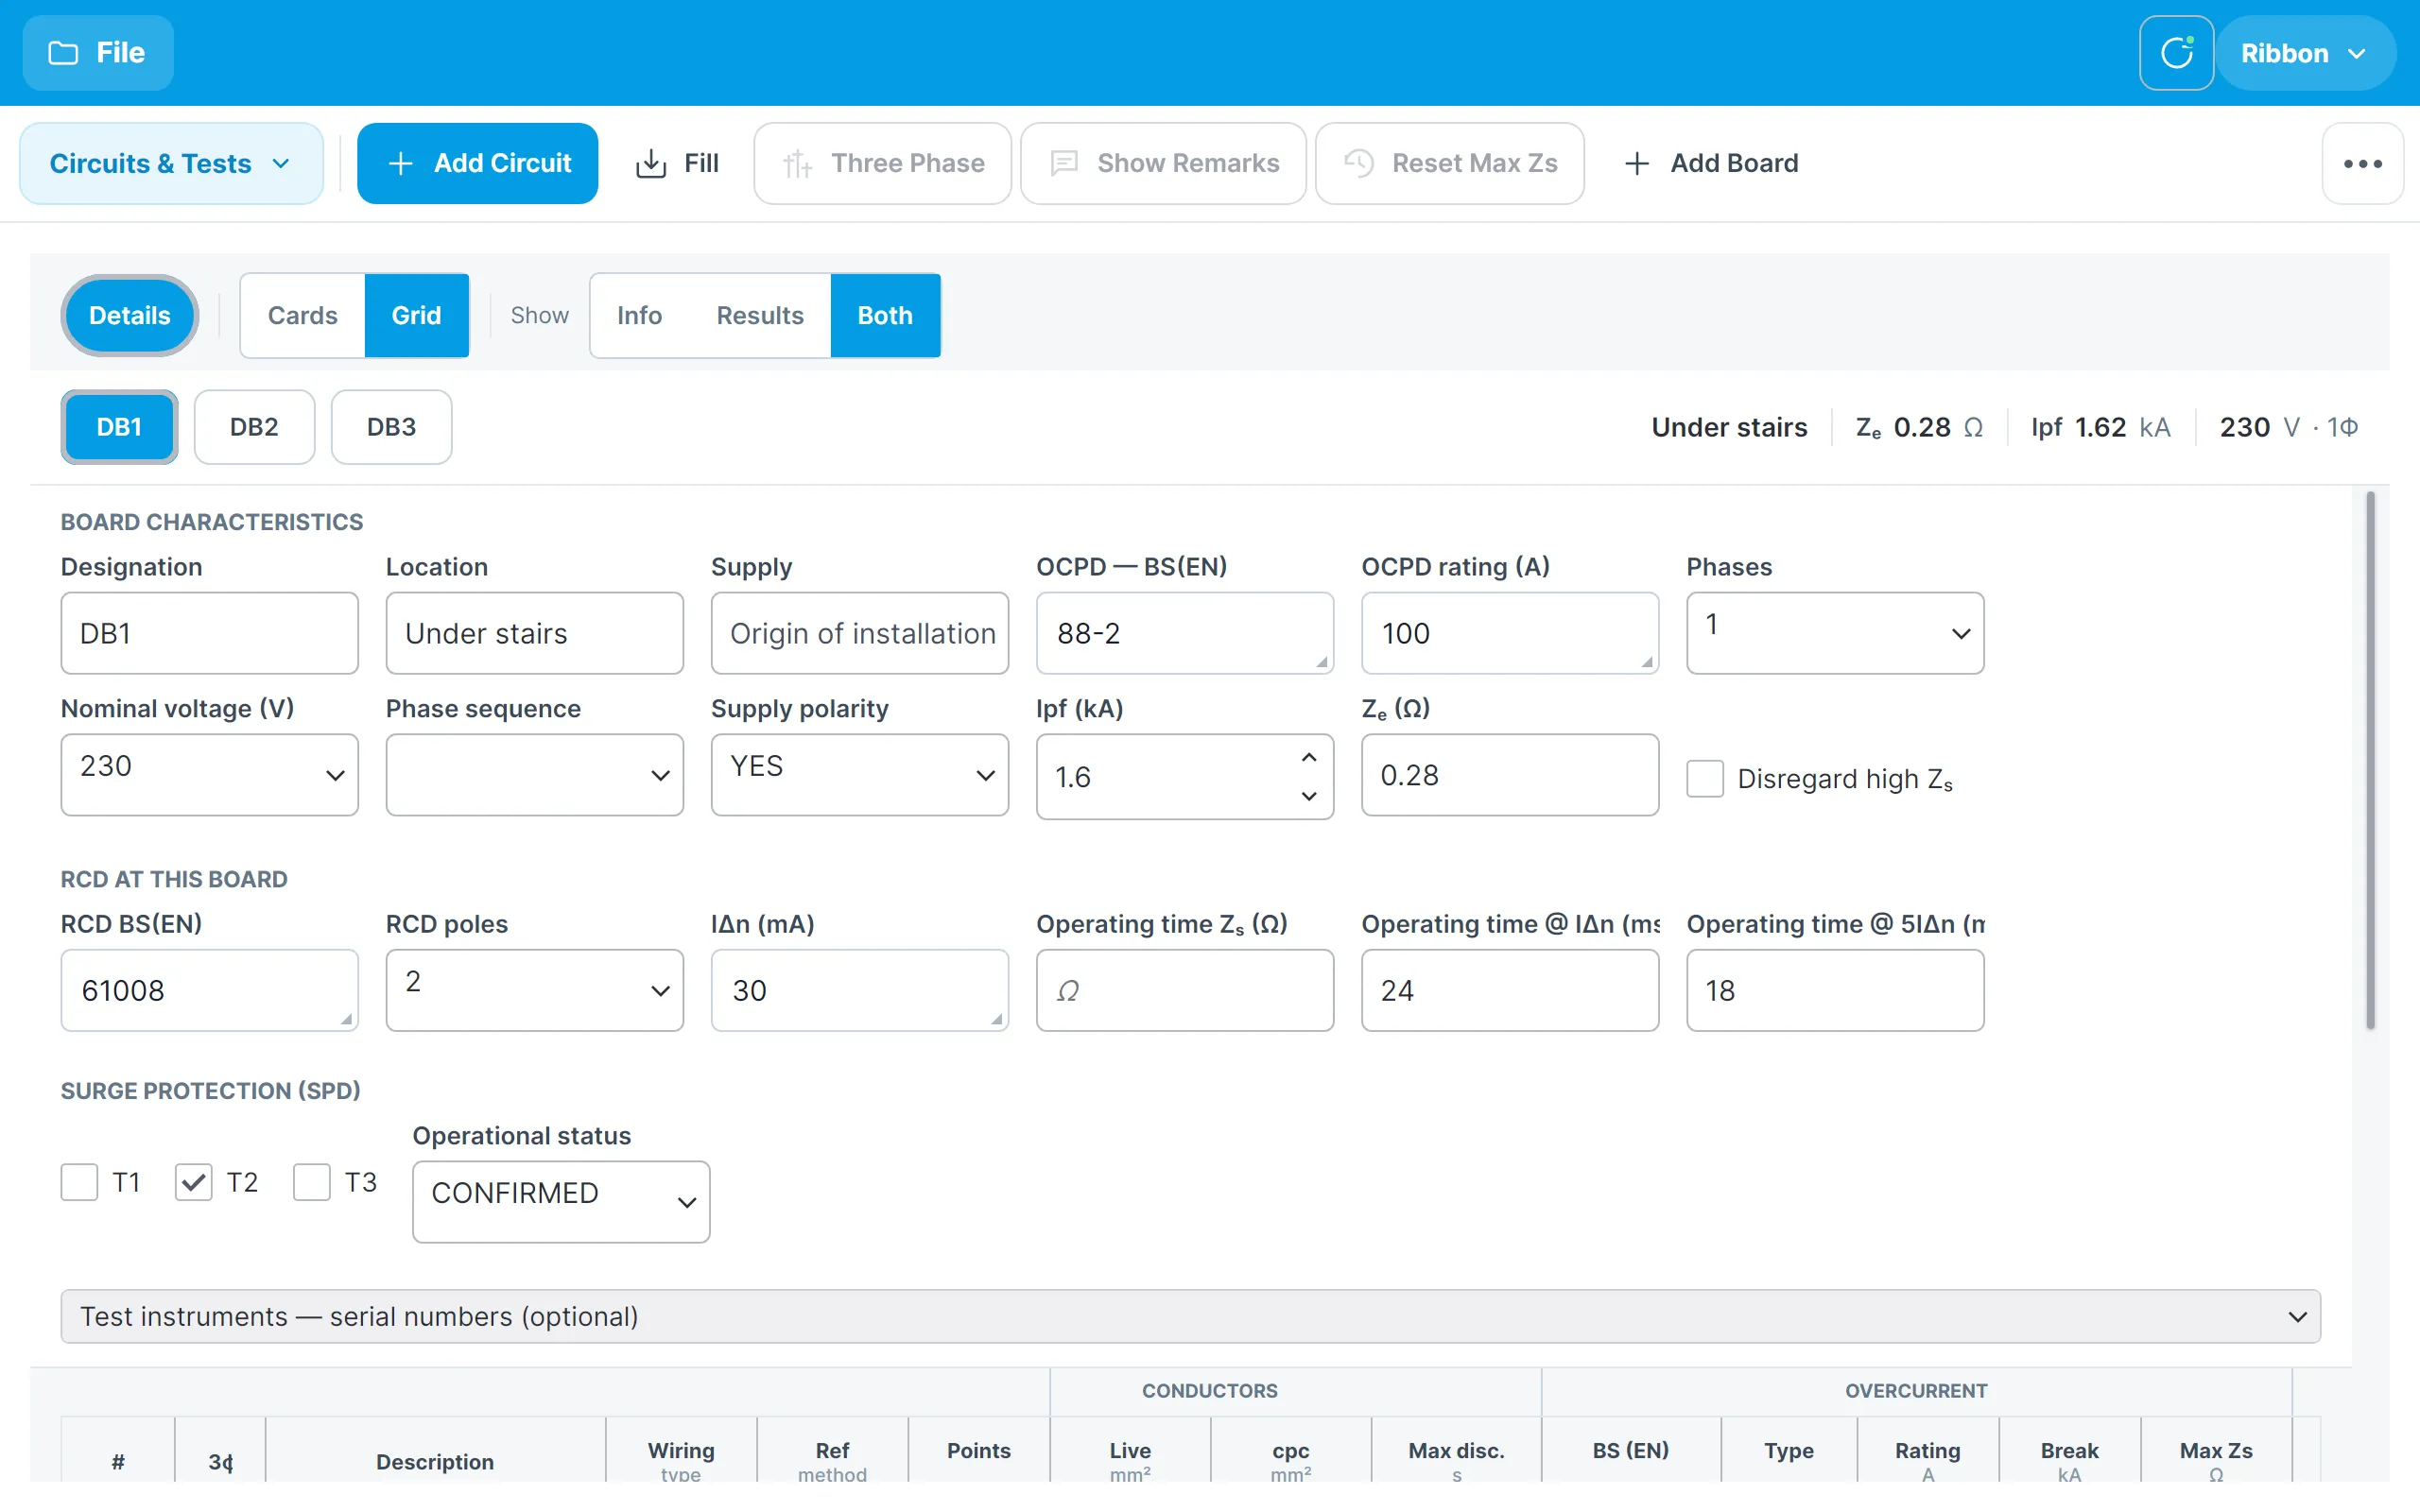
The controls at the top of the body are:
- Details shows or hides the board details panel.
- Cards and Grid switch how the circuits are shown.
- Show chooses whether each circuit shows its Info (the circuit details), its Results (the test results) or Both.
- The board tabs — DB1, DB2 and so on — switch between the boards in the certificate. The summary at the right shows the selected board’s location, Ze, Ipf, voltage and number of phases.
Board details
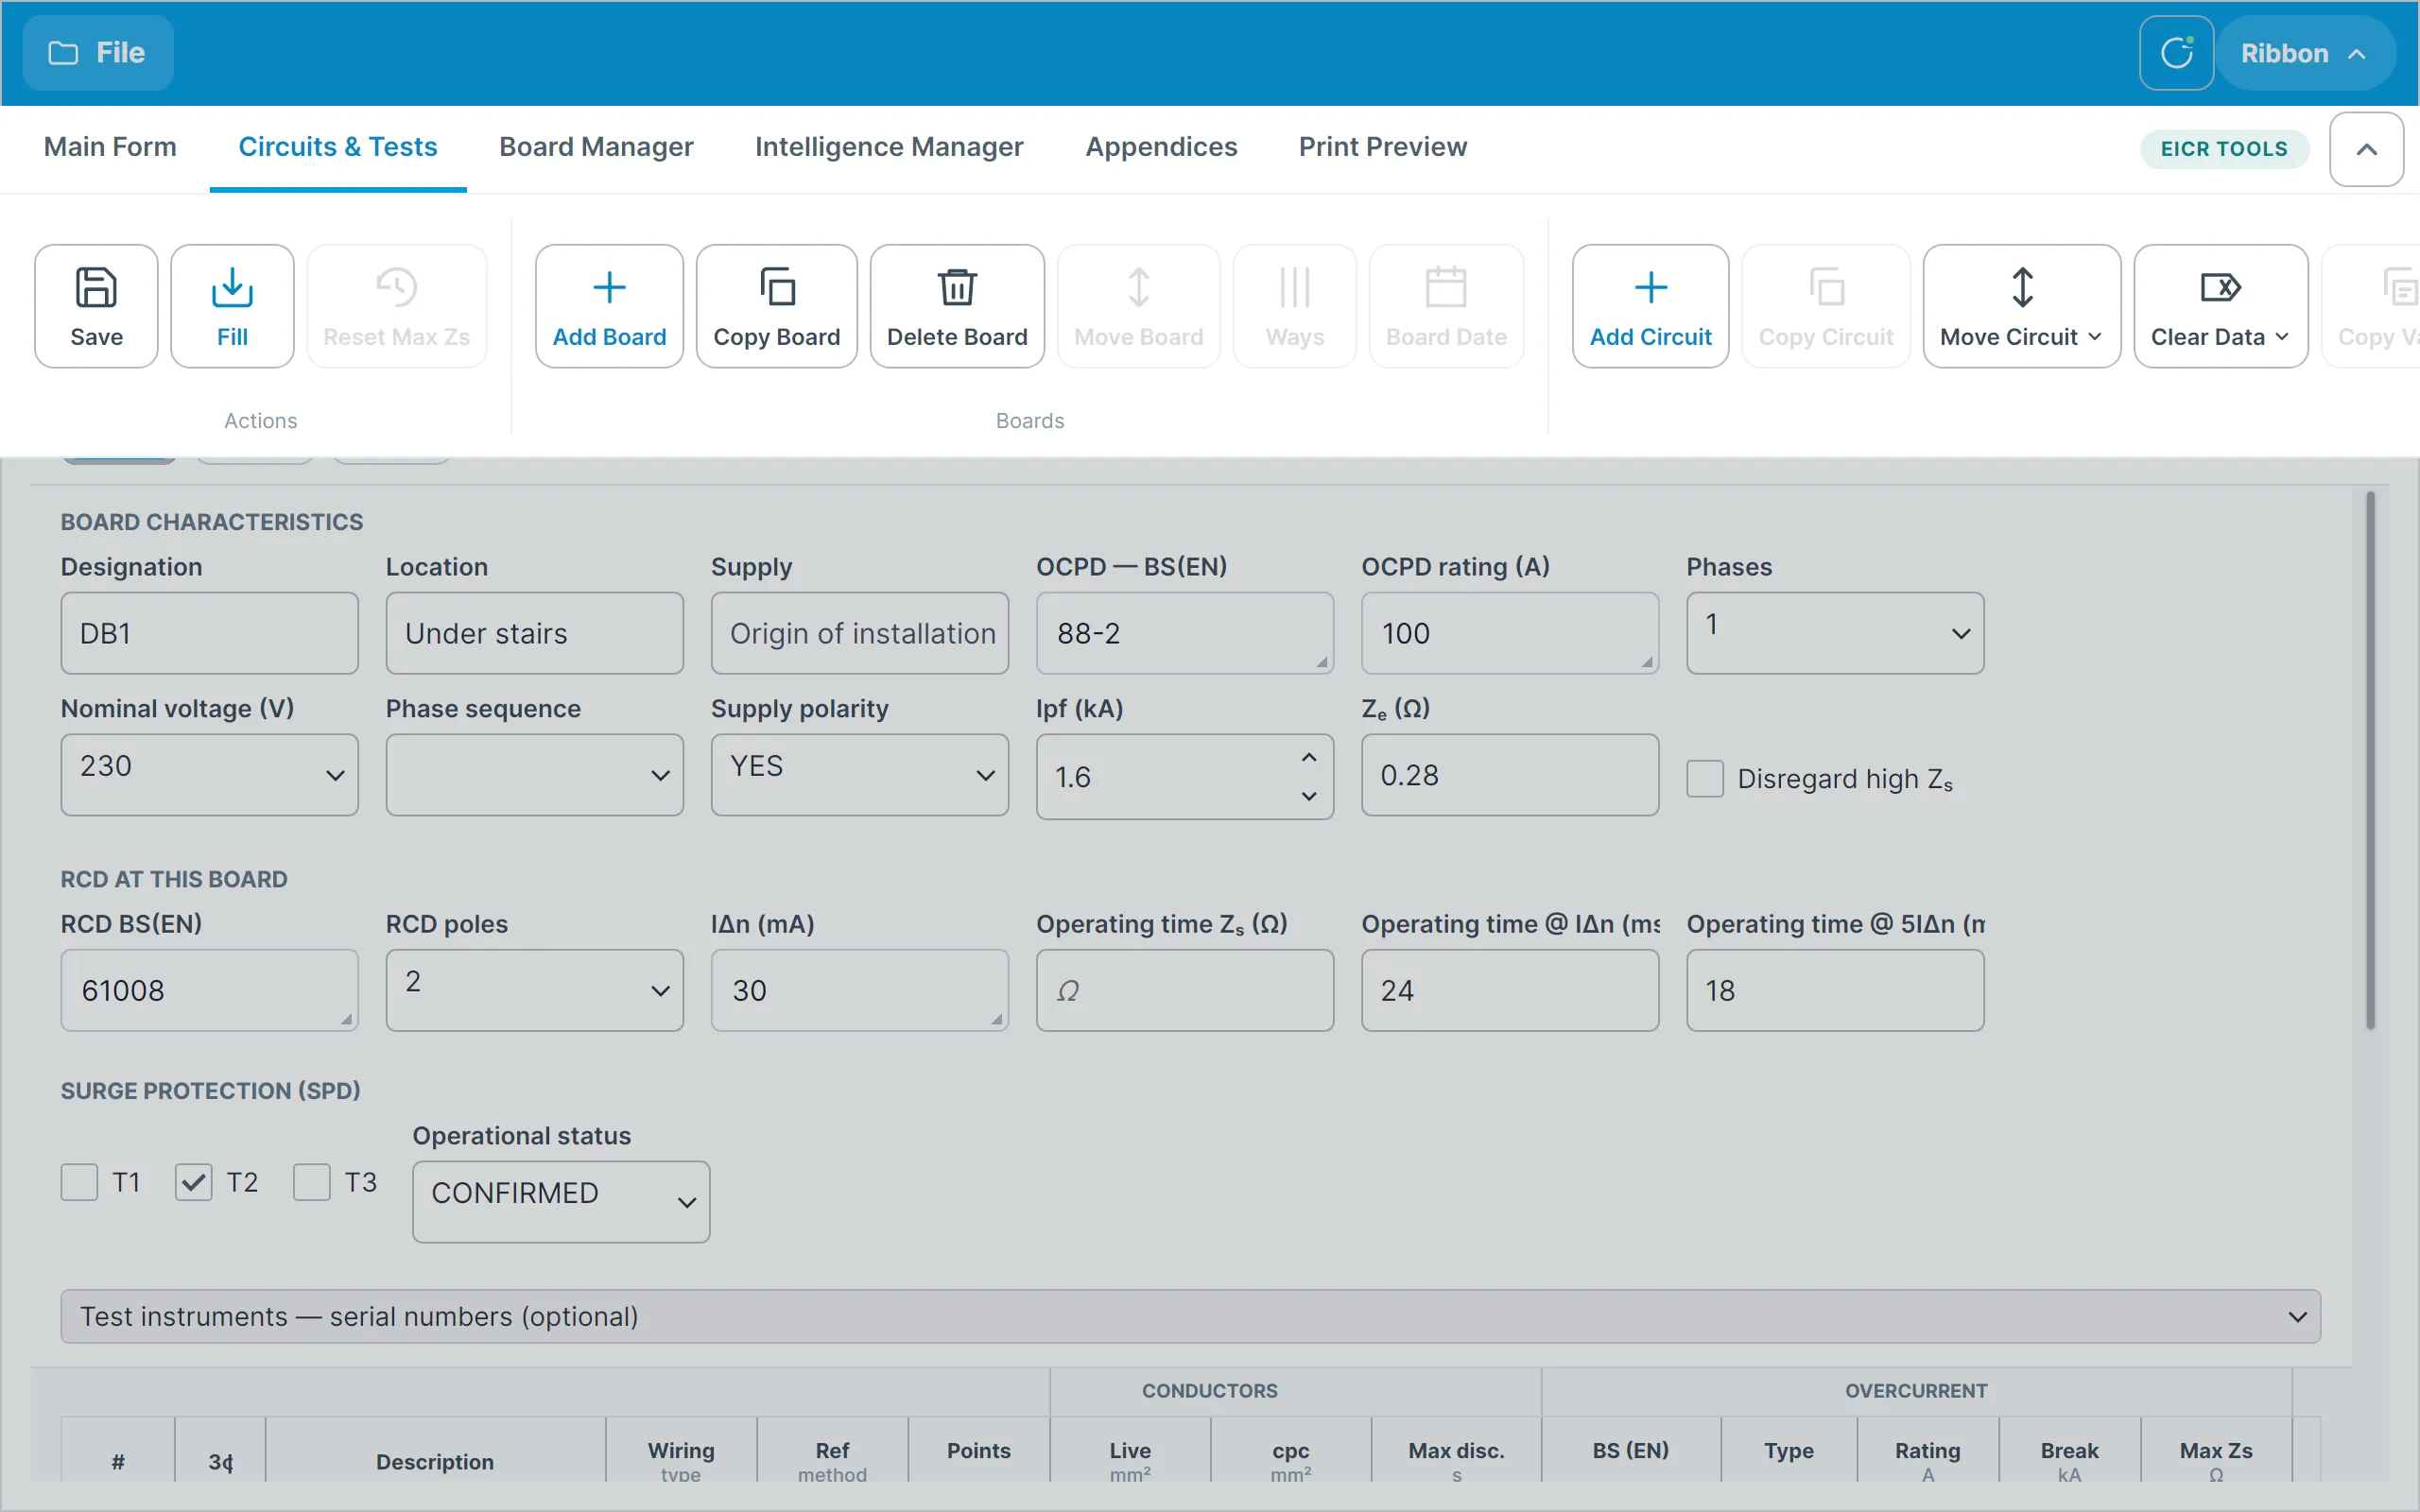
With Details on, the panel above the circuits records the board:
- Board characteristics — designation, location, supply, the OCPD protecting the board and its rating, the number of phases, nominal voltage, phase sequence, supply polarity, Ipf and Ze. Tick Disregard high Zs to suppress the high-Zs warning on this board.
- RCD at this board — the BS (EN), poles, rated residual current and operating times of any RCD protecting the whole board.
- Surge protection (SPD) — the types of SPD fitted (T1, T2, T3) and its operational status.
- Test instruments — the serial numbers of the instruments used, if you want them on the certificate.
The board’s supply is set in the Board Manager. Turn Details off to give the circuits the whole screen.
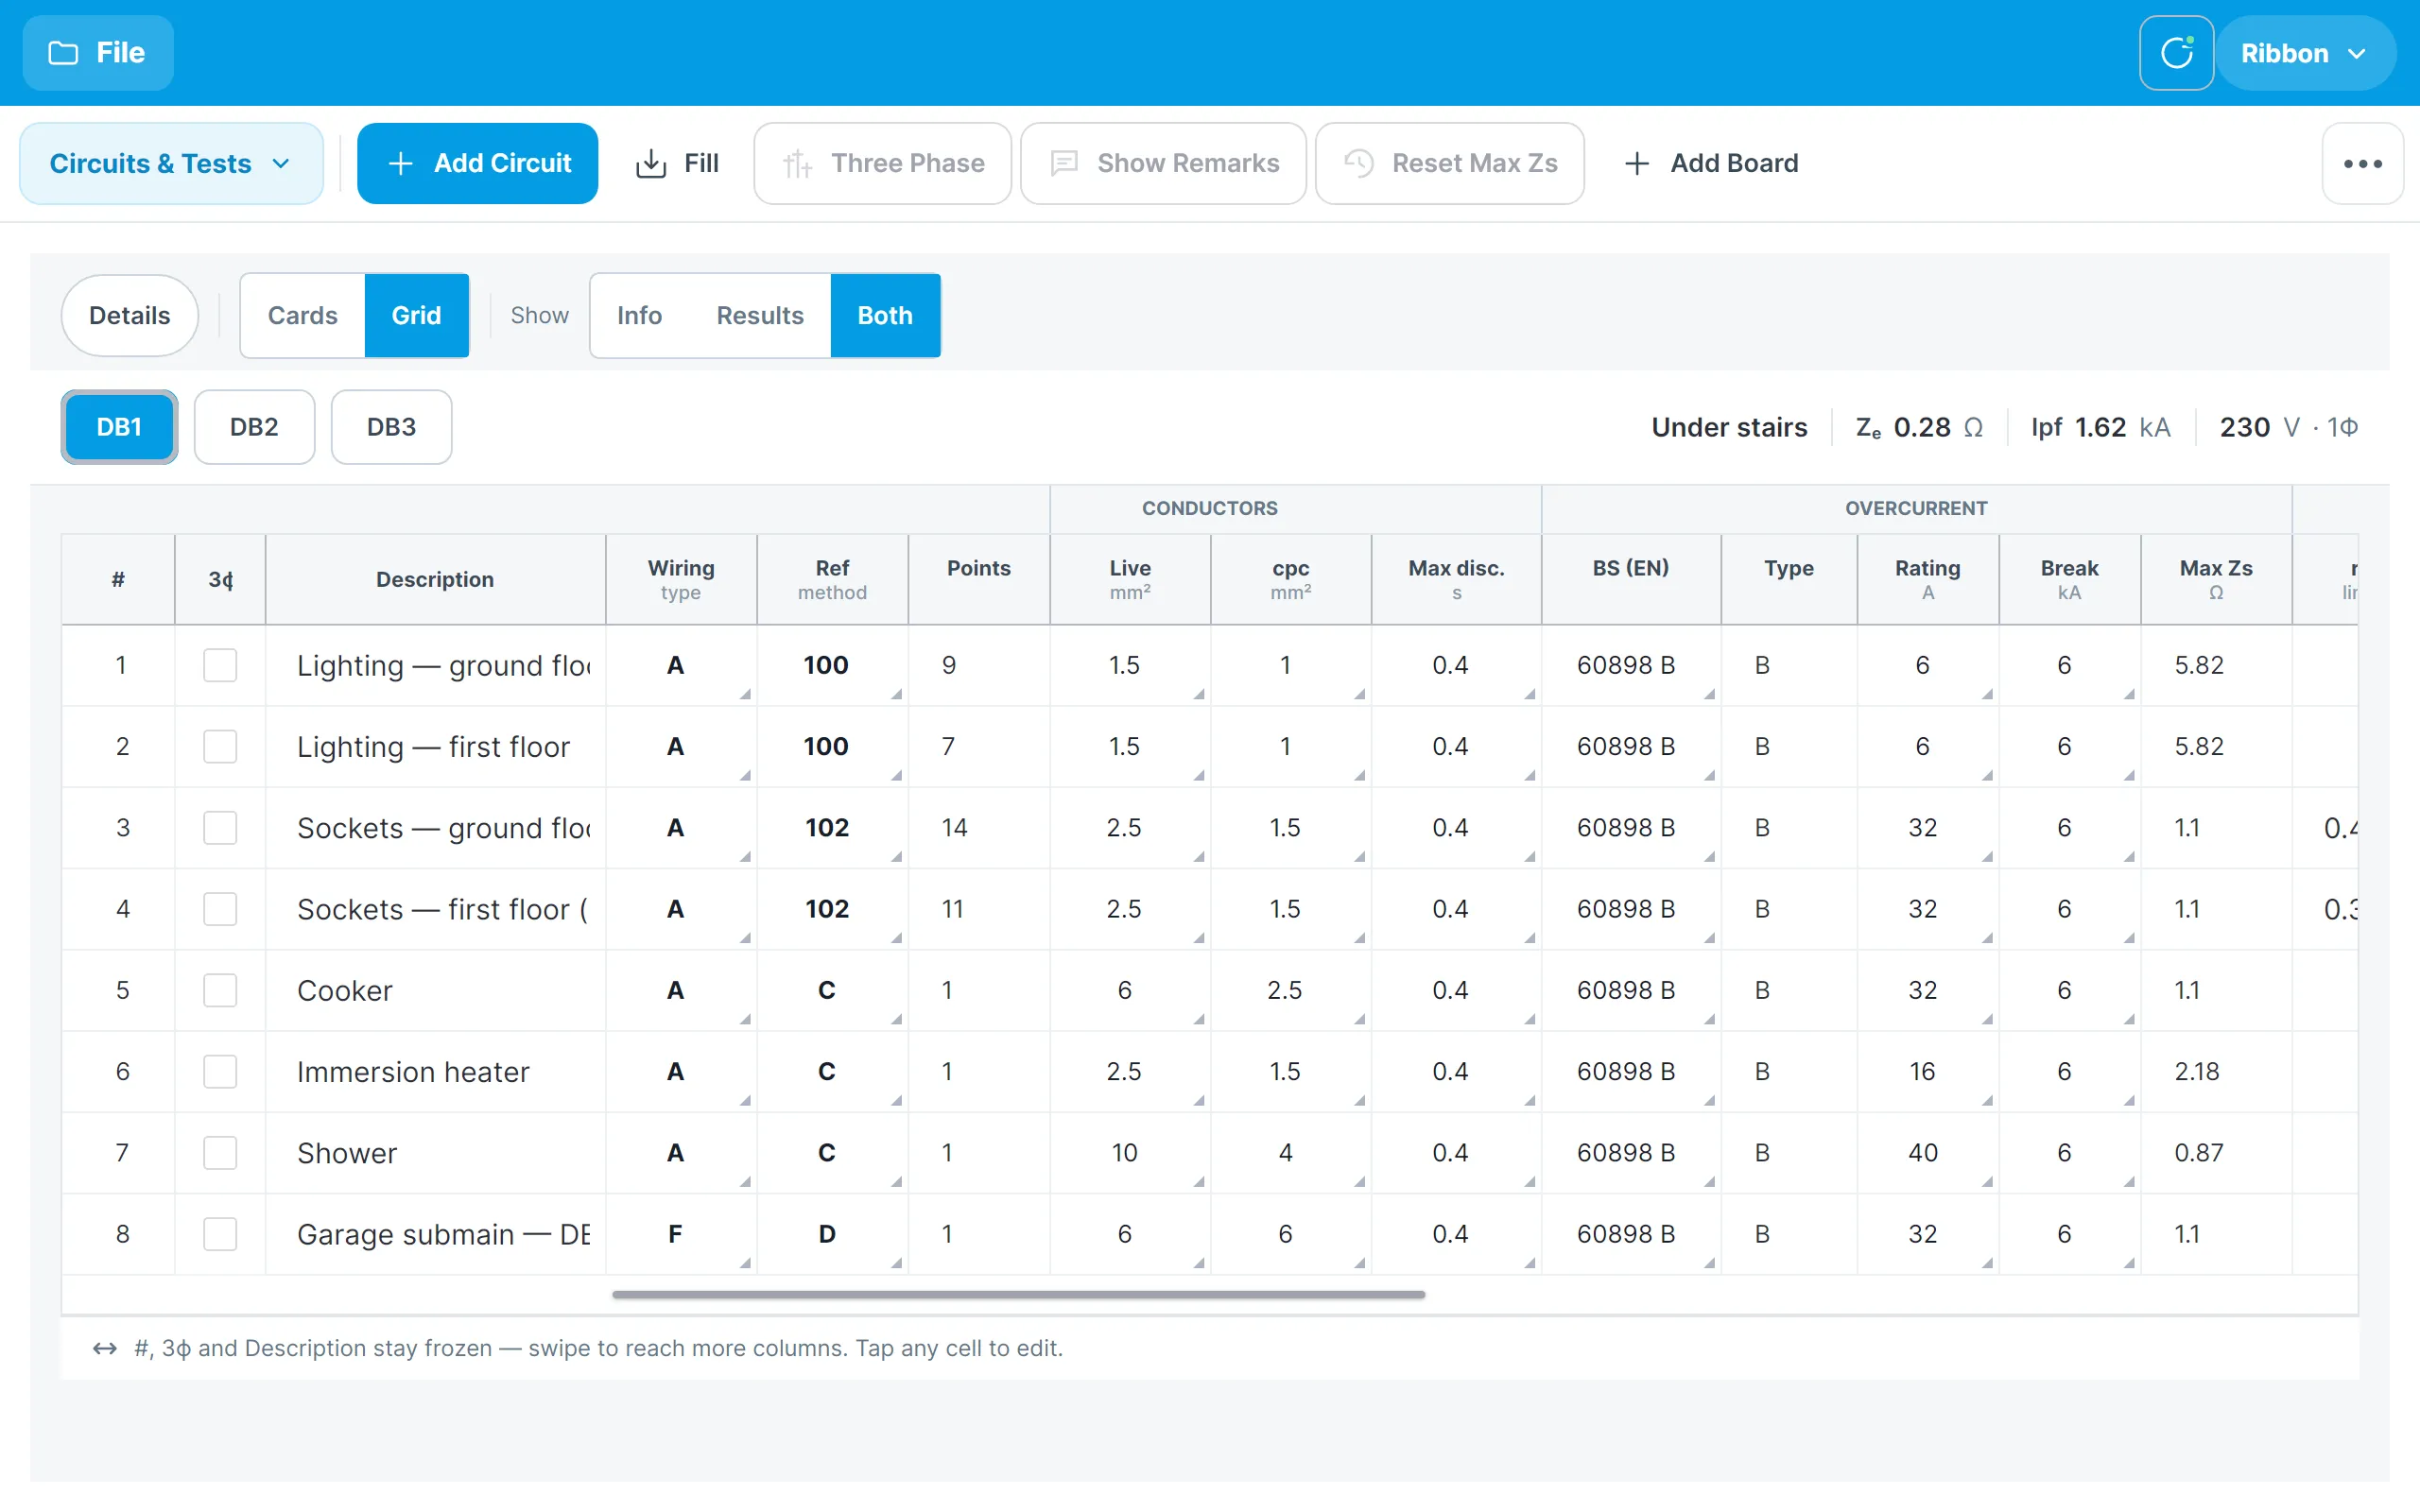
Grid view
The grid shows one row per circuit with the columns of the printed schedule: the conductors, the overcurrent device, the ring final and R1+R2 readings, insulation resistance, polarity, measured Zs, RCD operating times and the test buttons. The first three columns — the circuit number, the three-phase marker and the description — stay put while you swipe sideways to reach the rest.
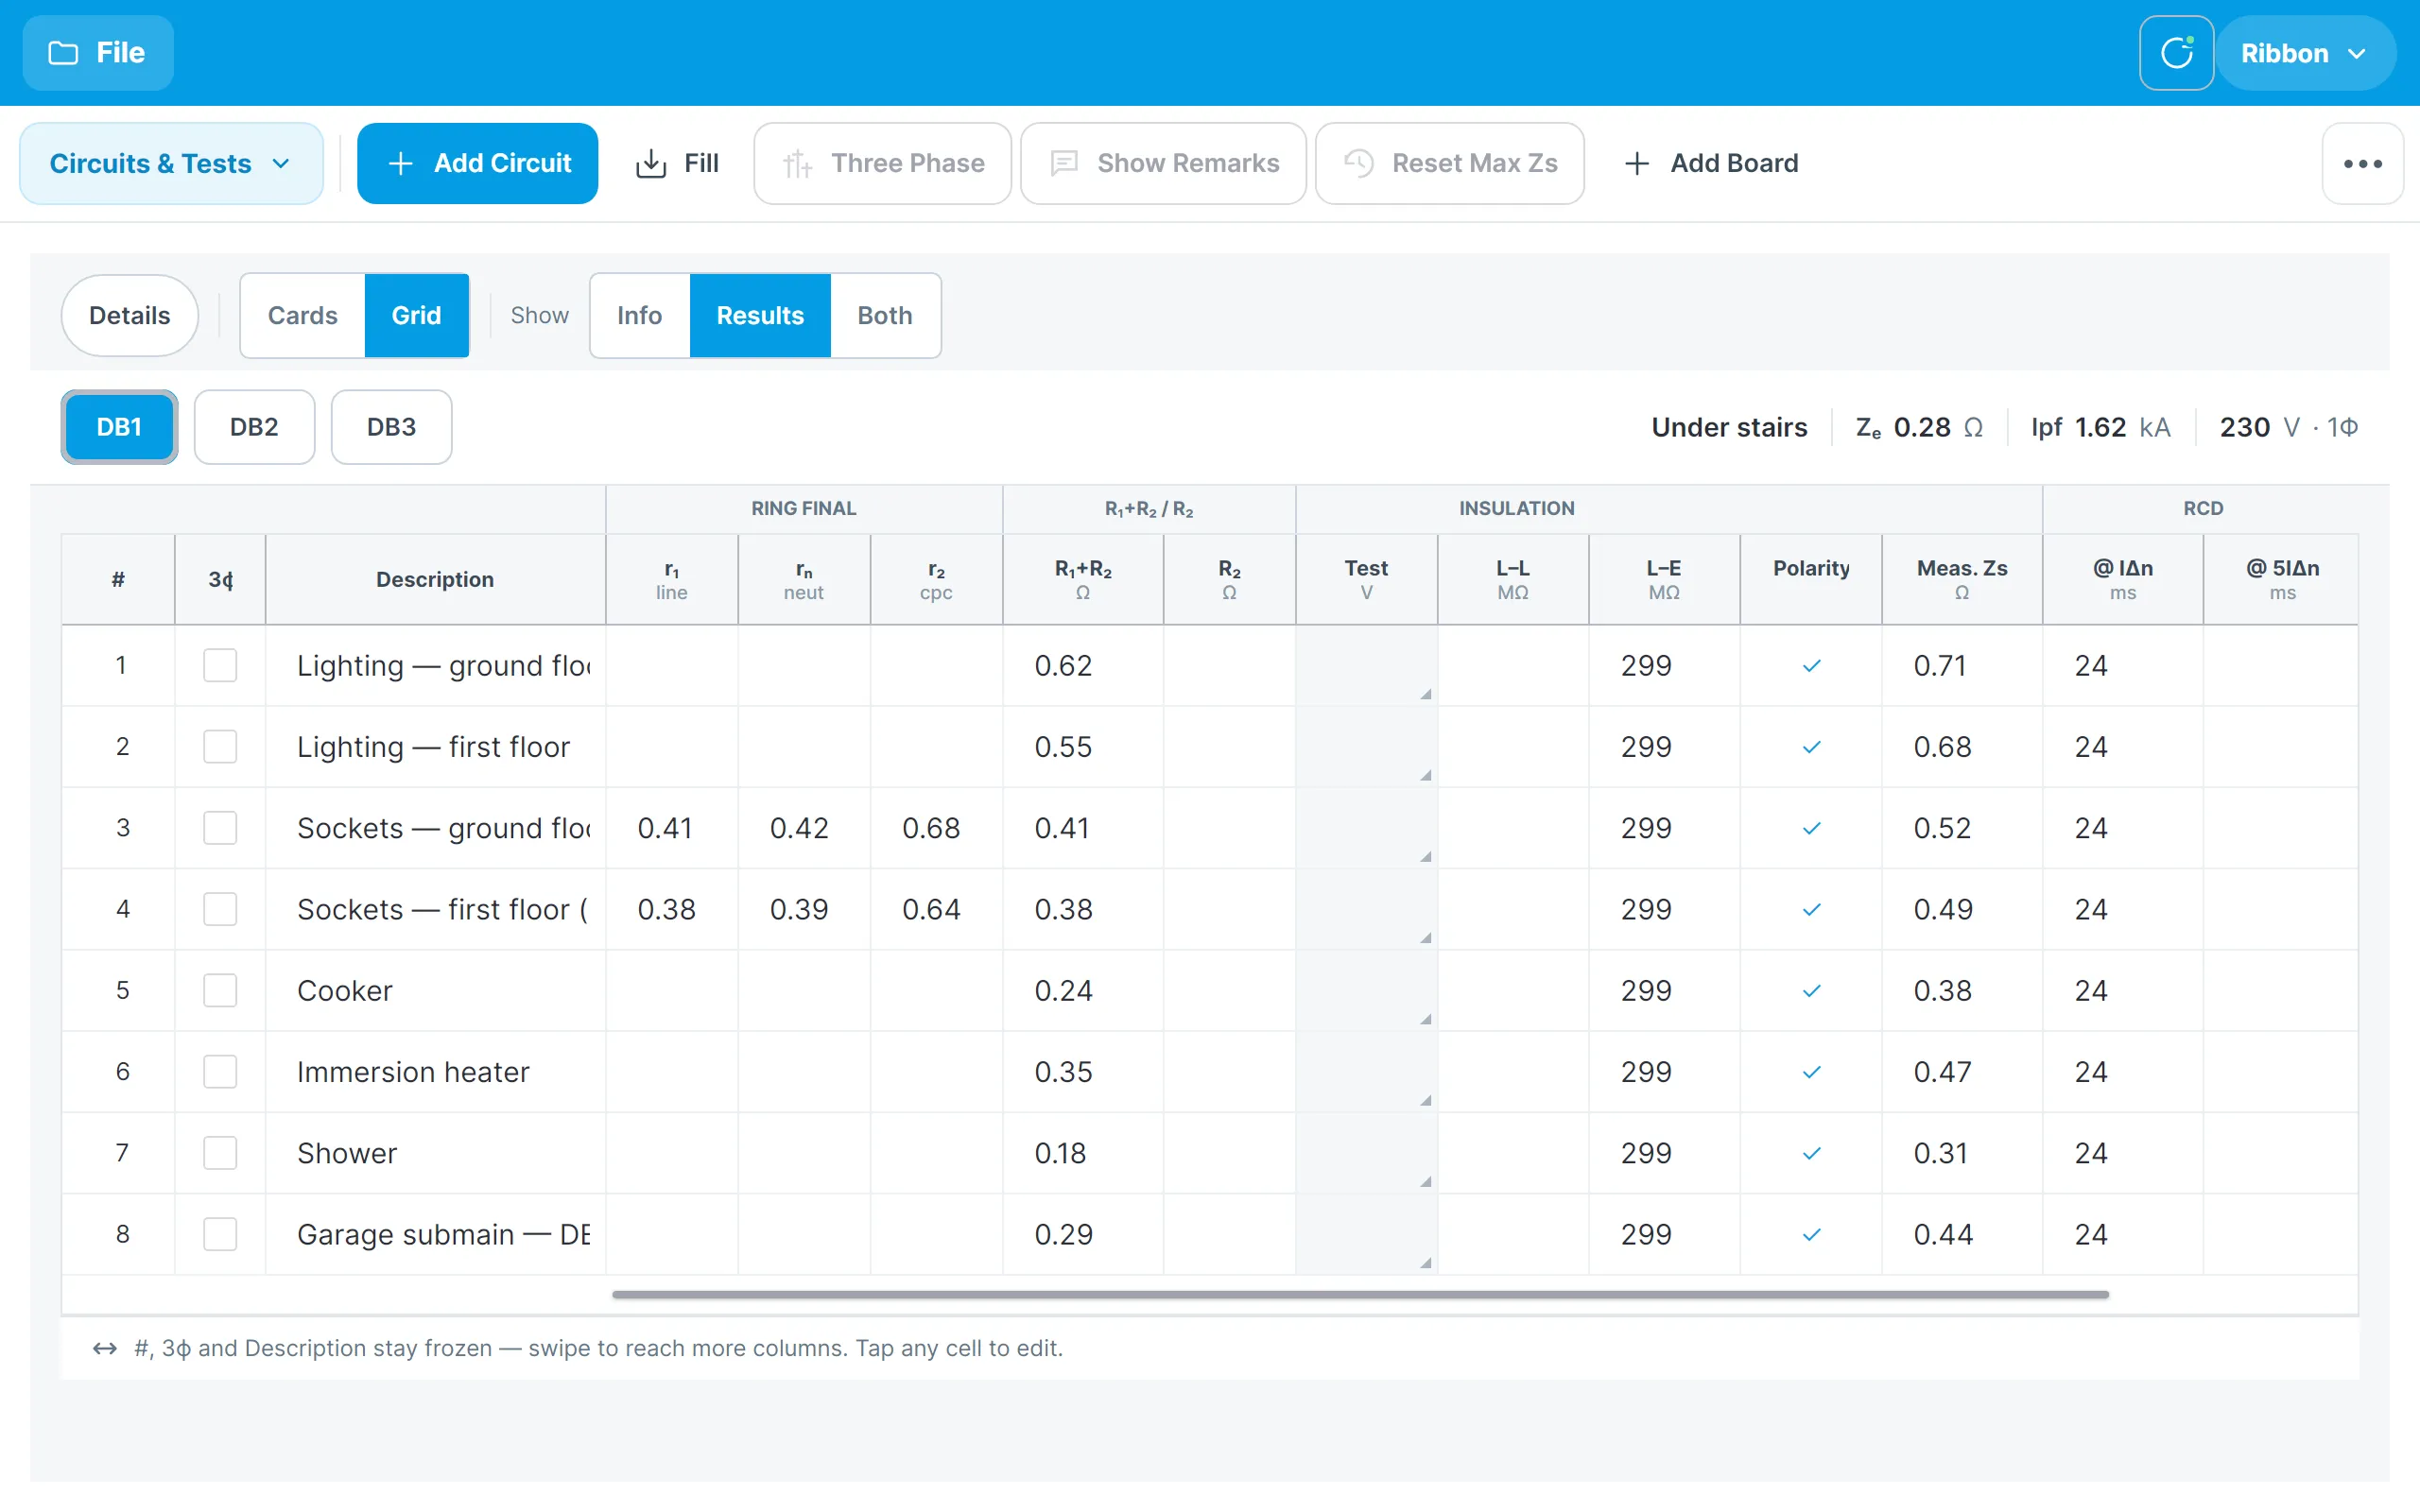
Use Show → Results to see only the test result columns:
The grid needs a tablet-sized screen. On a phone, or with the window very narrow, the app shows the card view only. On a 10” tablet in landscape the grid is offered and used by default.
Card view
The card view shows each circuit as a form. Tap a circuit’s header to expand it.
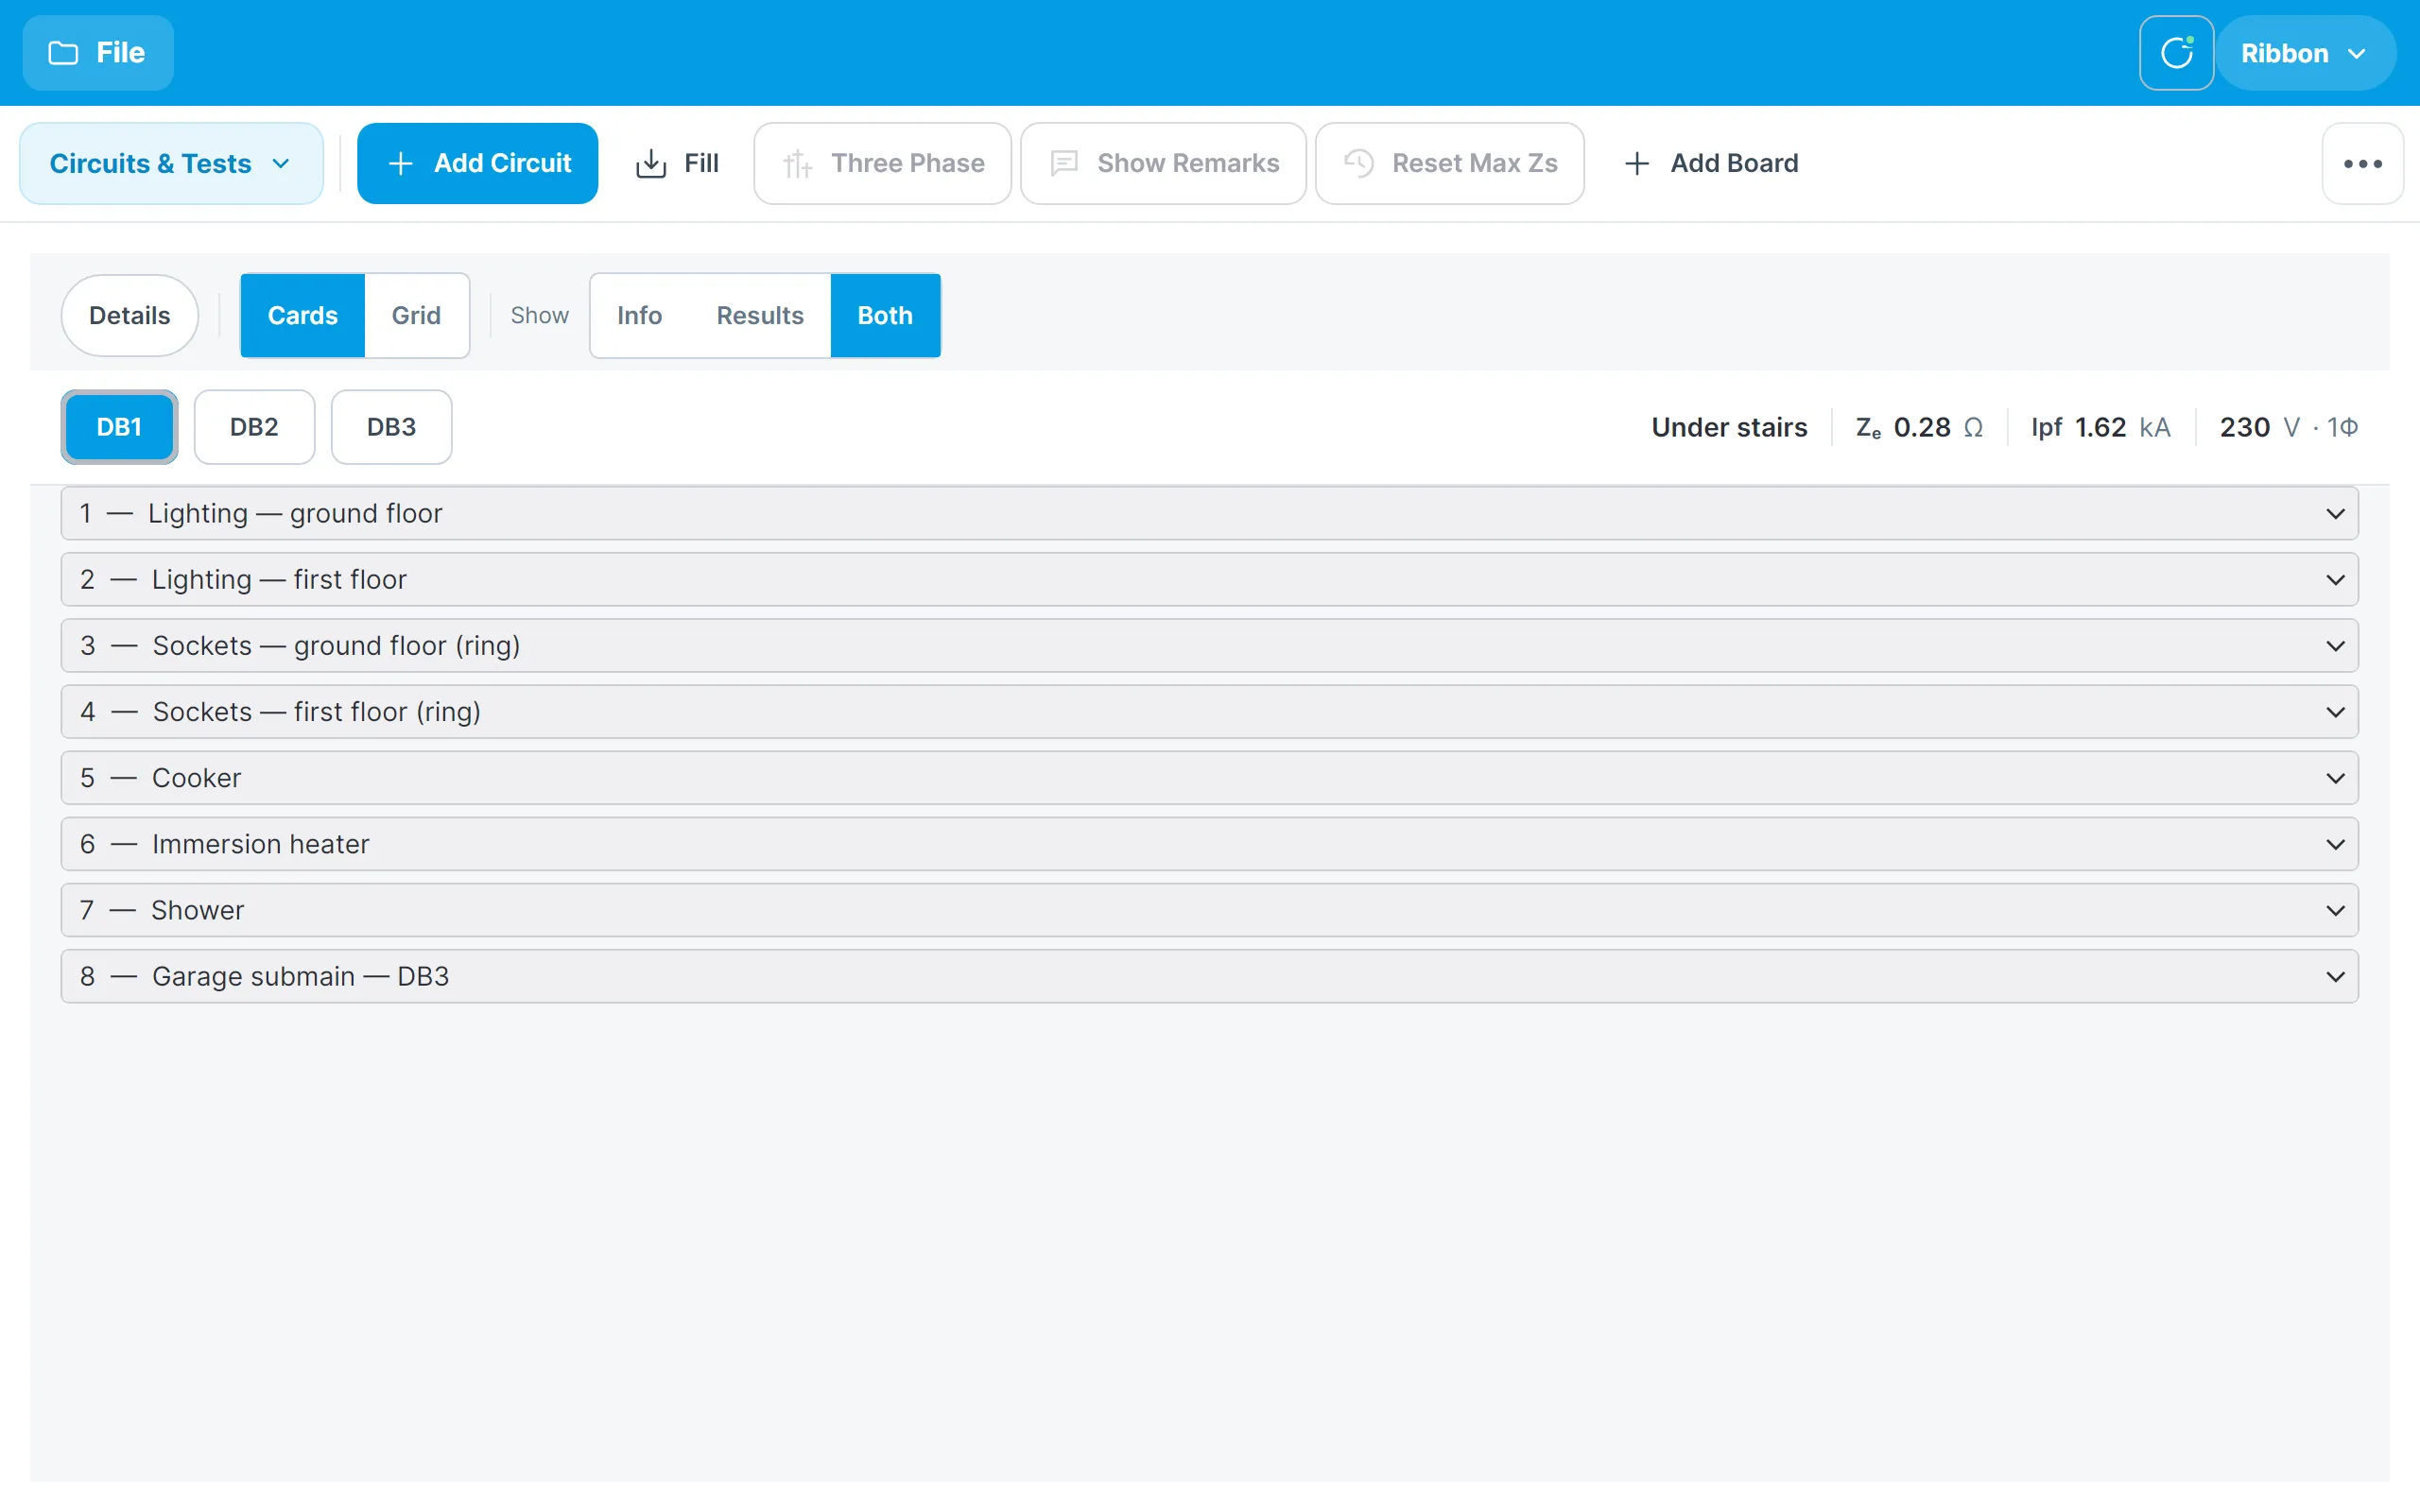
Each card has the same fields as the grid, grouped under Conductors, Overcurrent protective device, Continuity, Insulation resistance, RCD / RCBO and RCD device, plus the AFDD and SPD test buttons and the vulnerable to damage and disregard Zs flags. The buttons at the top of a card move it up or down, copy it, or open a menu to clear its info or results, merge it as three-phase, or delete it.
Under each card, the Circuit helper lists anything Intelligence has raised about that circuit, with a link to the Intelligence Manager.
Entering values with the pads
Tapping a cell in the grid, or a field on a card, does not open the keyboard. It opens a pad of the values that are valid for that field, so most entries are a single tap.
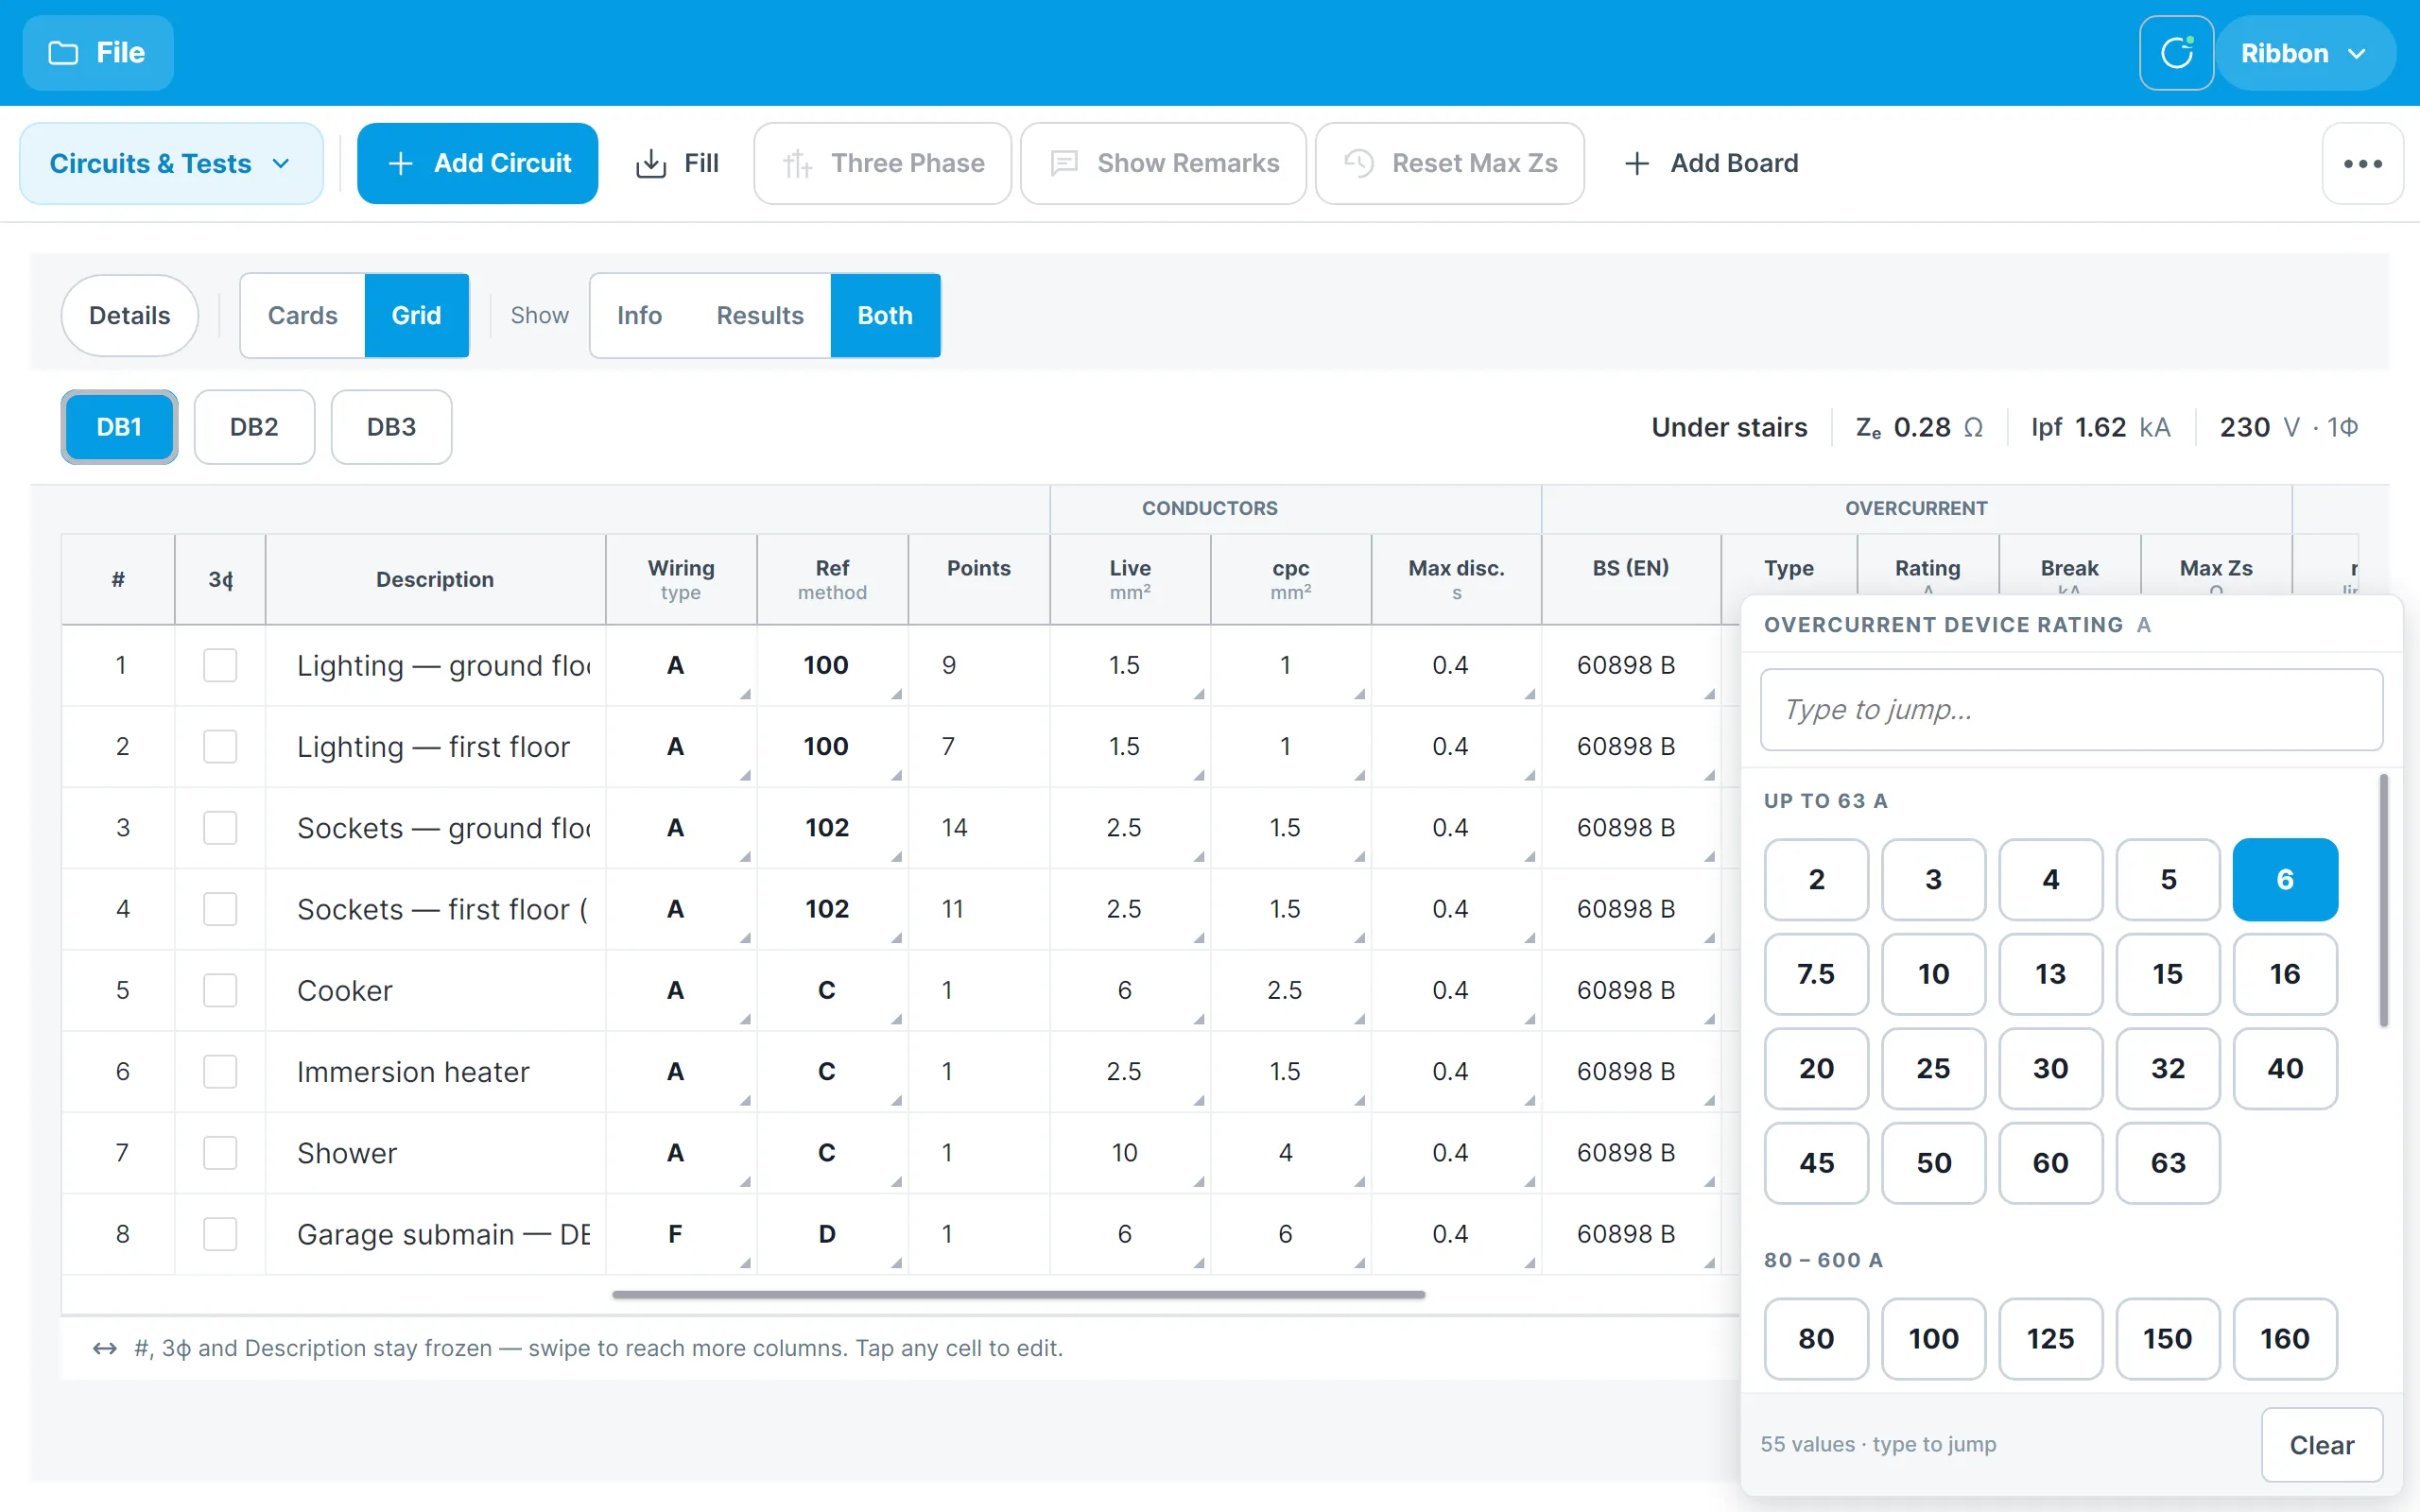
- Value pads list the standard values for the field, such as the OCPD ratings or cable sizes. Long lists have a Type to jump box: type a digit or two to jump to that part of the list. You can also just start typing on a cell and the pad opens ready filtered.
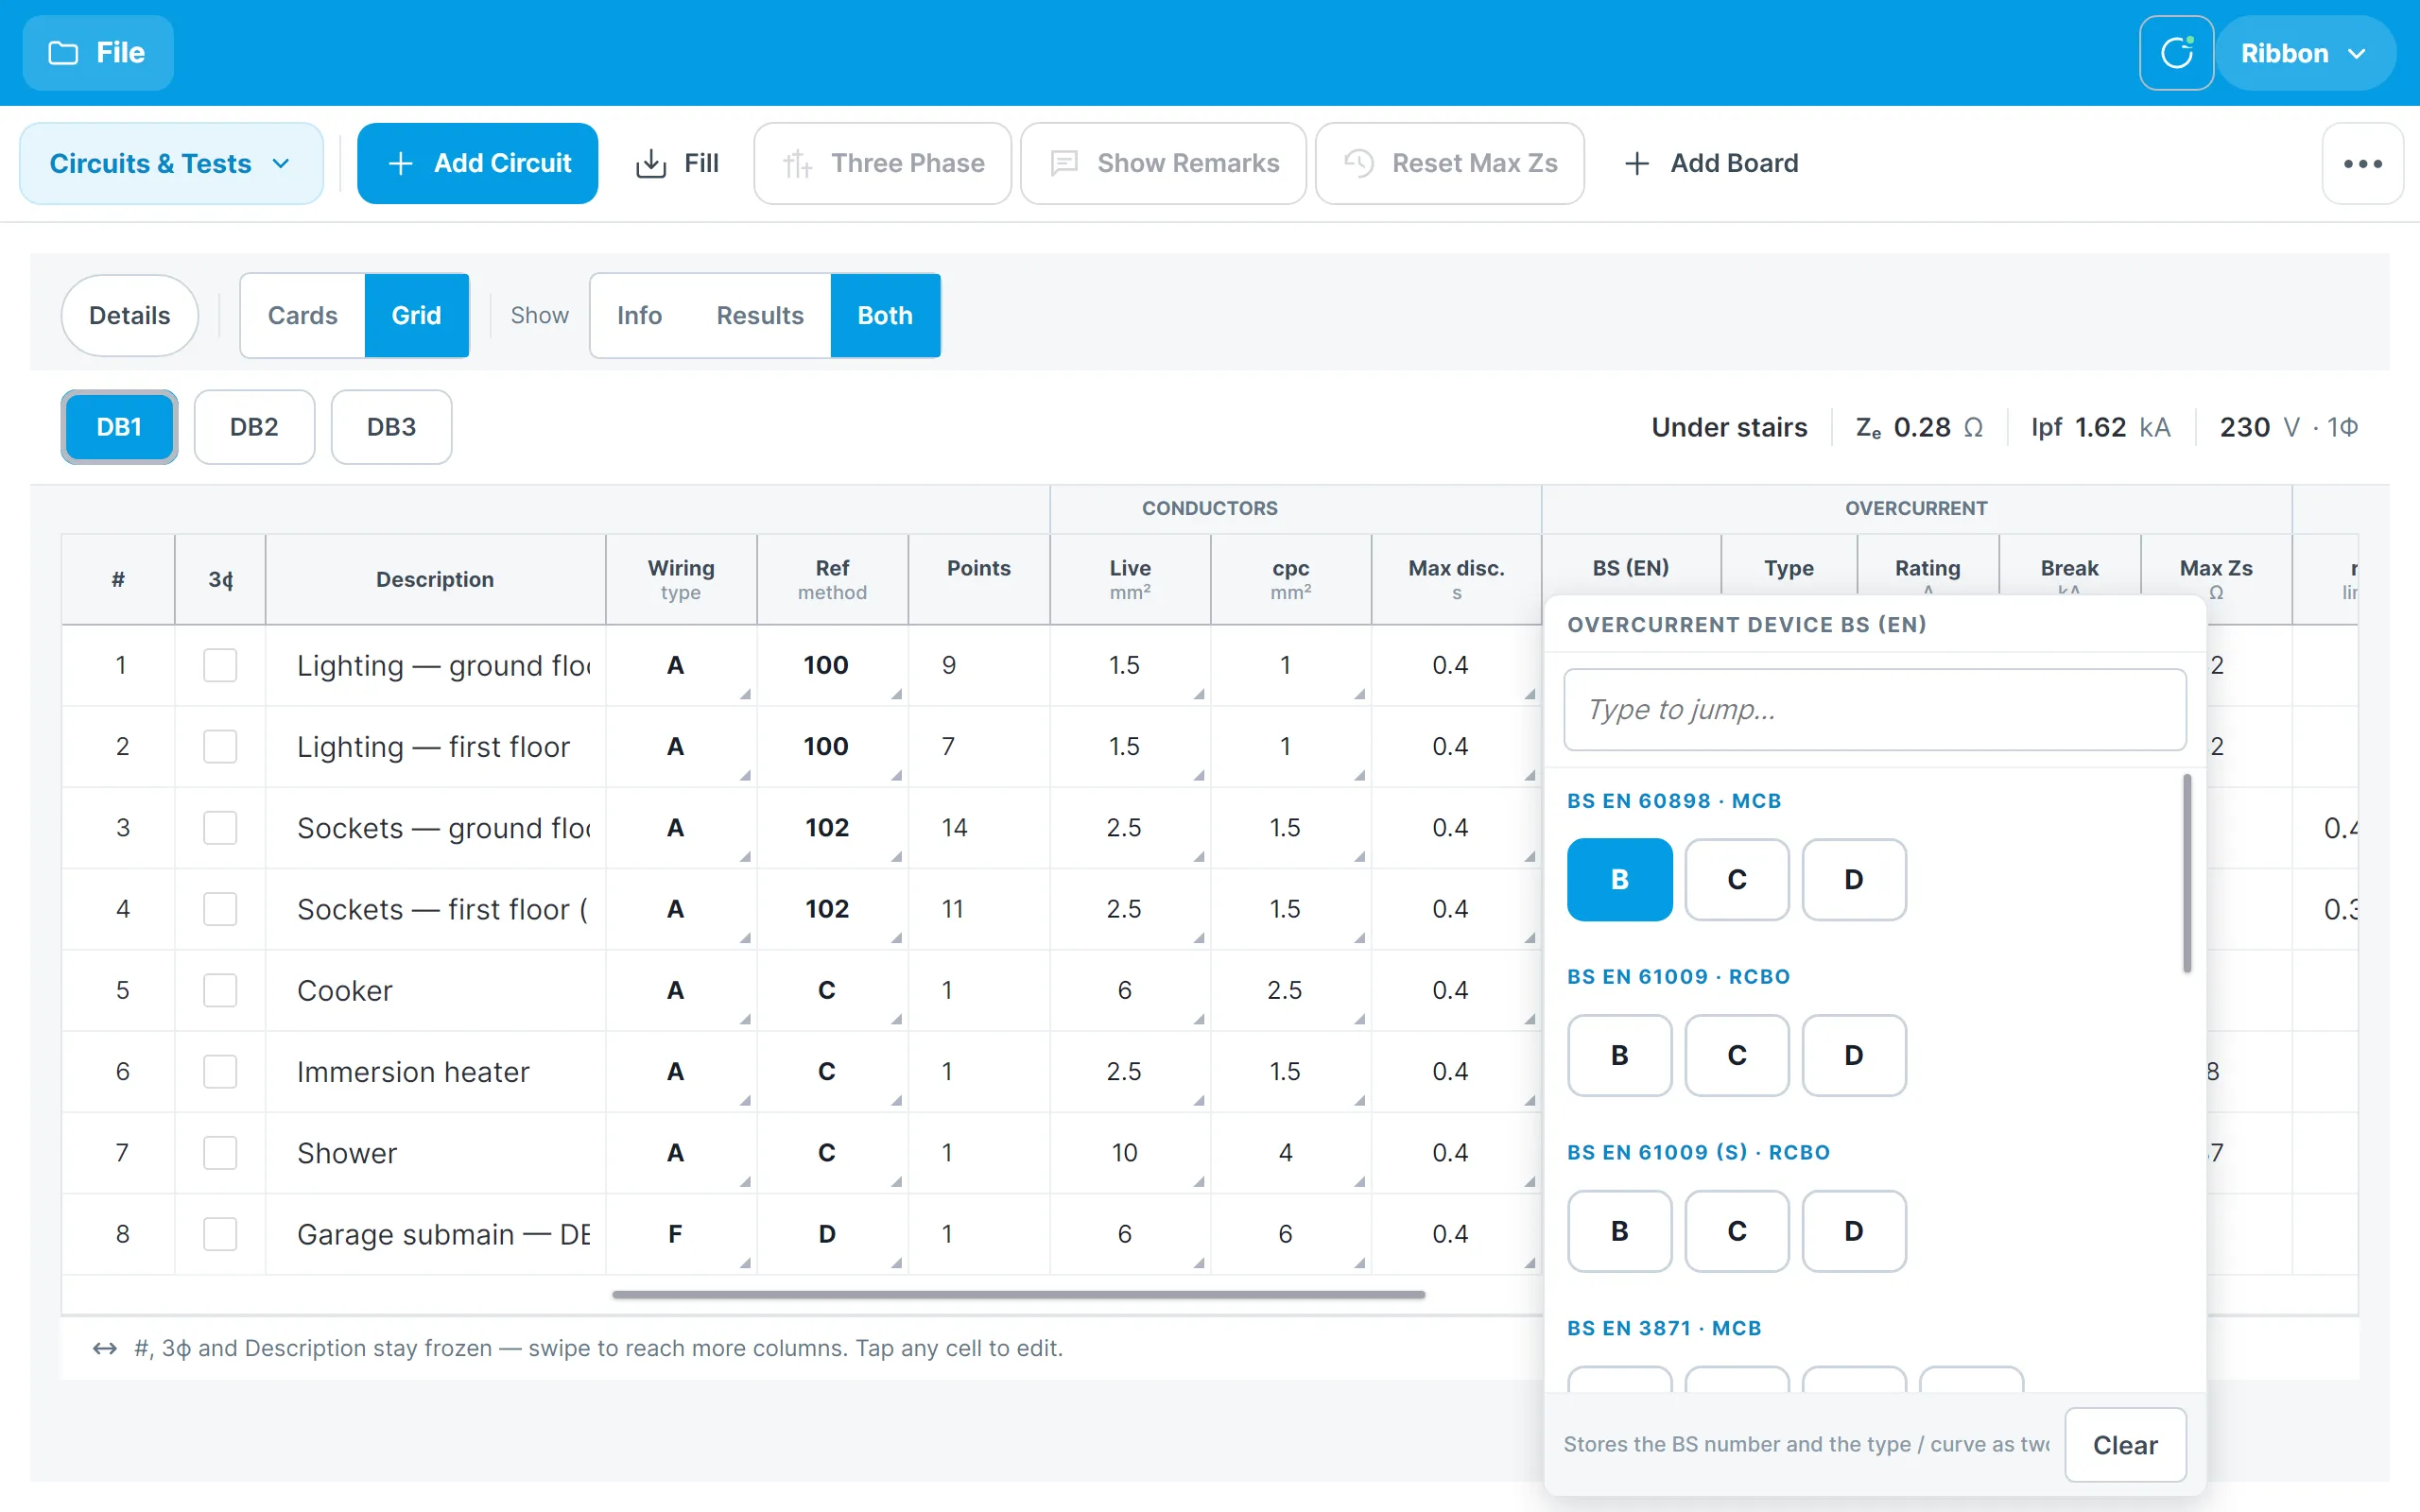
- Grouped pads enter two fields at once. The BS (EN) pad is headed by the standard — BS EN 60898 · MCB, BS EN 61009 · RCBO and so on — and its tiles are the device types or curves, so one tap writes both the BS (EN) and the Type.
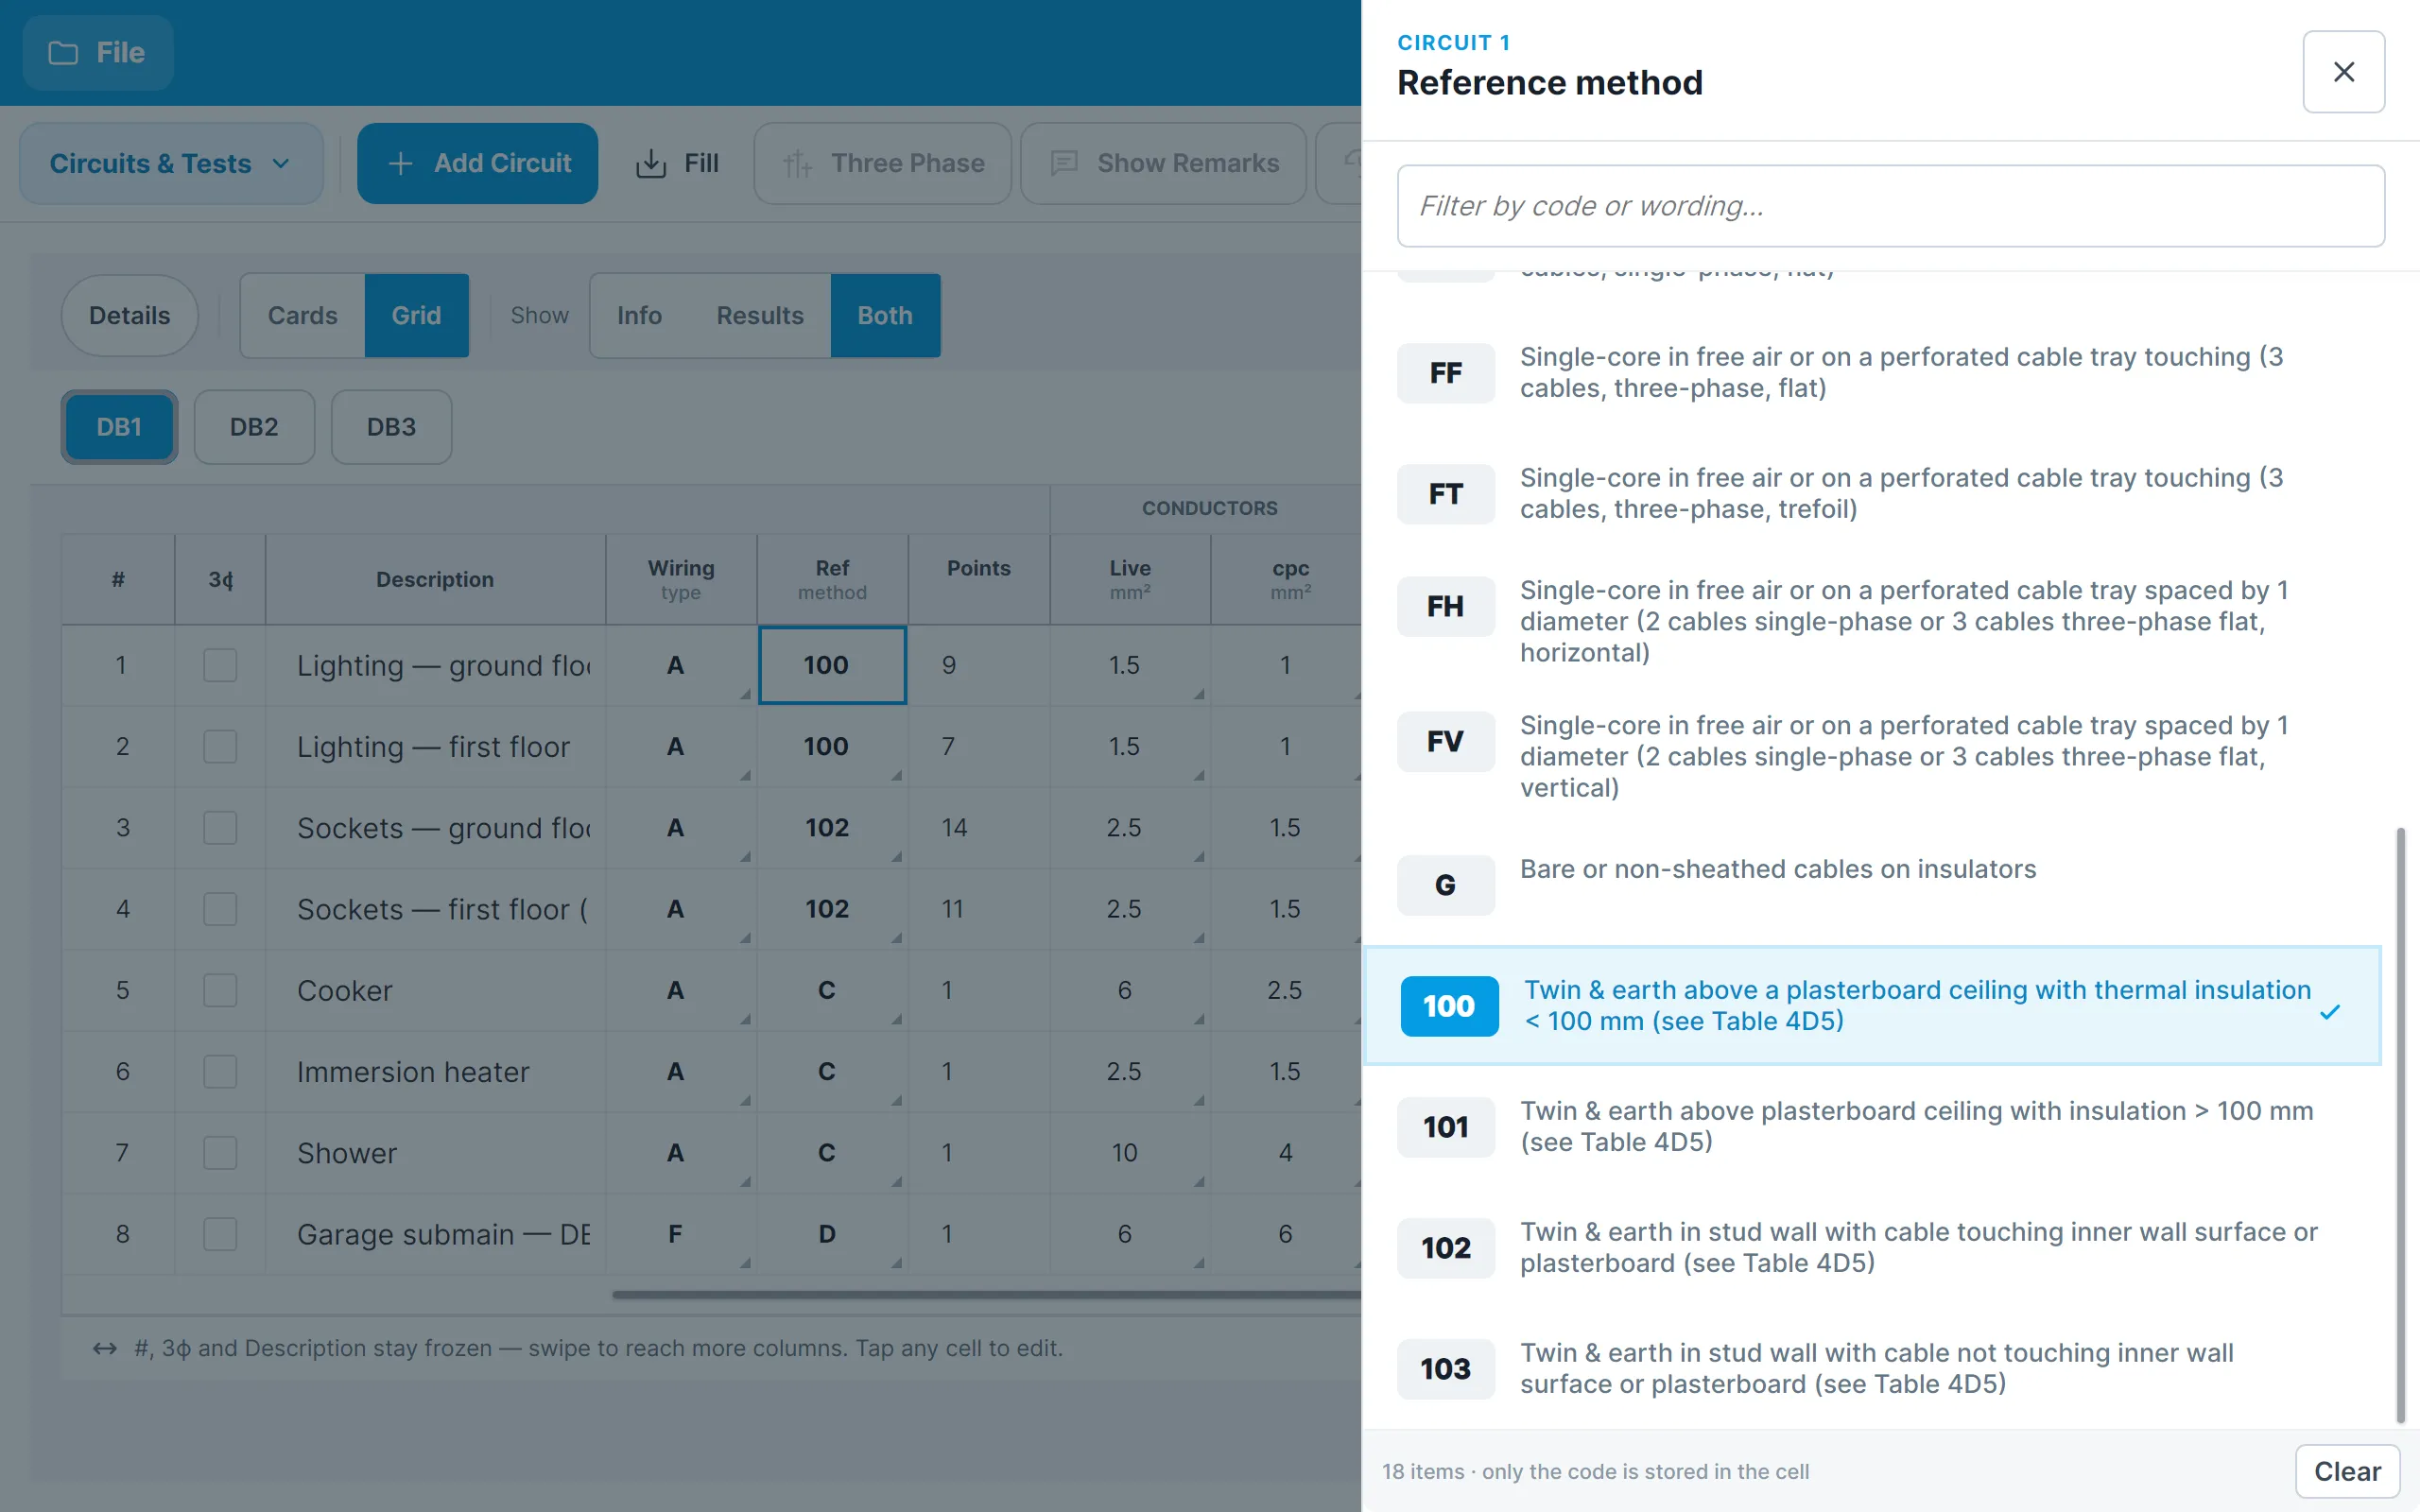
- Code sheets open for fields whose values are codes with a description, such as the wiring type and the reference method. Each row shows the code and its full wording, with a box to filter by code or wording.
Tap Clear at the bottom of a pad to empty the field.
Filling a column
Many circuits share the same values — the same wiring type, the same reference method, the same test voltage. The Fill tool copies a value down a column in one go.
- Tap Fill in the ribbon. The grid opens if it isn’t already showing, and a banner asks you to tap a source cell.
- Tap the cell whose value you want to copy.
- Choose where to fill: Fill blanks below, Fill all blank cells in the column, Overwrite all below, or Pick cells to fill… to tap the individual cells you want. The rows that will change are highlighted.
- Tap Fill to confirm. The banner offers Undo in case you change your mind.
Copying a blank cell clears the chosen cells instead, which is a quick way to empty a column.
Adding, copying and arranging circuits
The ribbon row holds the most used actions:
- Add Circuit adds a circuit to the end of the board.
- Add Board adds a new board.
- Fill starts the Fill tool.
- Three Phase merges the selected circuit with its neighbours into a three-phase circuit on a three-phase board, and reads Unmerge when the selected circuit is already merged. The 3ϕ column marks the circuits that belong to a three-phase group.
The full Ribbon holds the rest: Copy Circuit, Move Circuit up or down, Clear Data (clear all the circuit’s values, or just its test results), Delete Circuit, and Copy Board and Delete Board for the current board.
Copying circuits to another board
Select the circuit and tap Copy to Clipboard in the full ribbon. Switch to the board you want to copy it into, and tap Paste Circuits — the button names the circuit and the boards it is copying from and to. The copied circuit stays on the clipboard, so you can paste it into several boards.
As you enter cable sizes, protective devices and test results, Intelligence compares them with the regulations and raises a statement when something doesn’t add up, such as a cable too small for its protective device. The Circuit helper under each card shows what was raised.