
Schedule Manager
The Schedule Manager is where you look after your library of inspection schedules — the numbered lists of items you inspect and code when completing an EICR. The app ships with the standard BS 7671 schedules, and the Schedule Manager lets you view those, copy them, adapt the copies, and build your own schedules from scratch. When you create a new certificate, you choose which schedule it starts from.
To open it, go to File → Schedule Manager on the Home Screen:
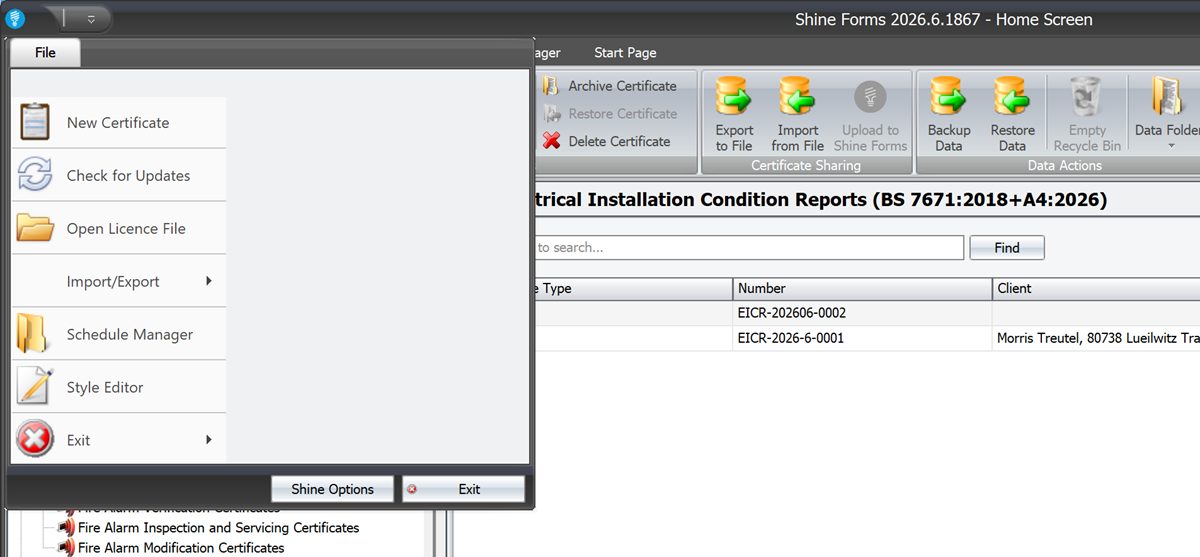
The schedule library
The home screen shows every schedule in your library as a card:
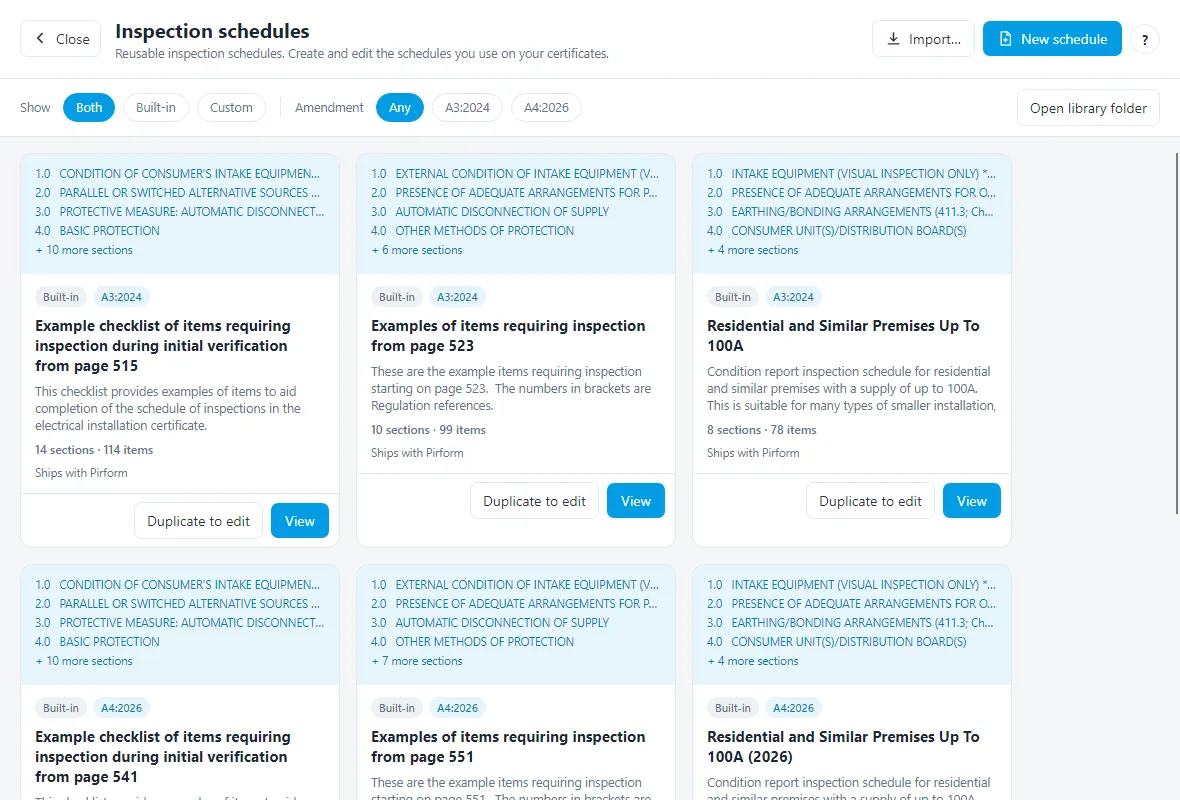
Each card shows:
- A preview of the schedule’s first few sections.
- Built-in or Custom — built-in schedules ship with the app and are read-only; custom schedules are your own and fully editable.
- The amendment badge — which edition of BS 7671 the schedule applies to: A3 (the EICR, EIC and Minor Works 2024 forms), A4 (the 2026 forms), or both.
- Section and item counts, and when the schedule was last edited.
Finding a schedule
Use the filter pills under the header to narrow the library:
- Show — Both, Built-in only, or Custom only.
- Amendment — Any, A3, or A4. A schedule tagged for both amendments appears under either filter; a schedule with no tag appears only under Any.
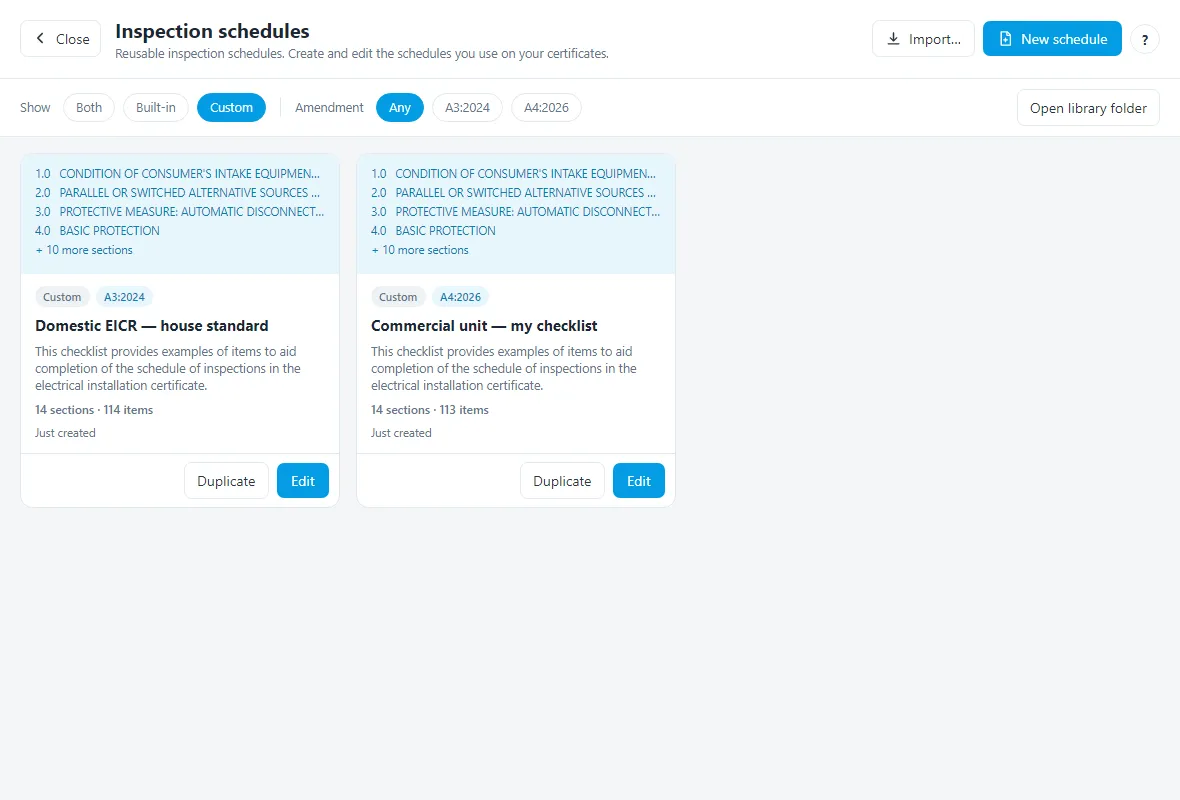
Open library folder opens the folder where your custom schedules are stored, which is handy for backing them up or copying a schedule file from a colleague straight into your library.
The standard schedules
The schedules that ship with the app — the residential Part 7 schedules and the example checklists from BS 7671 — are read-only. You can open one with View to read through it, but you can’t change it, so the standard wording is always there to come back to.
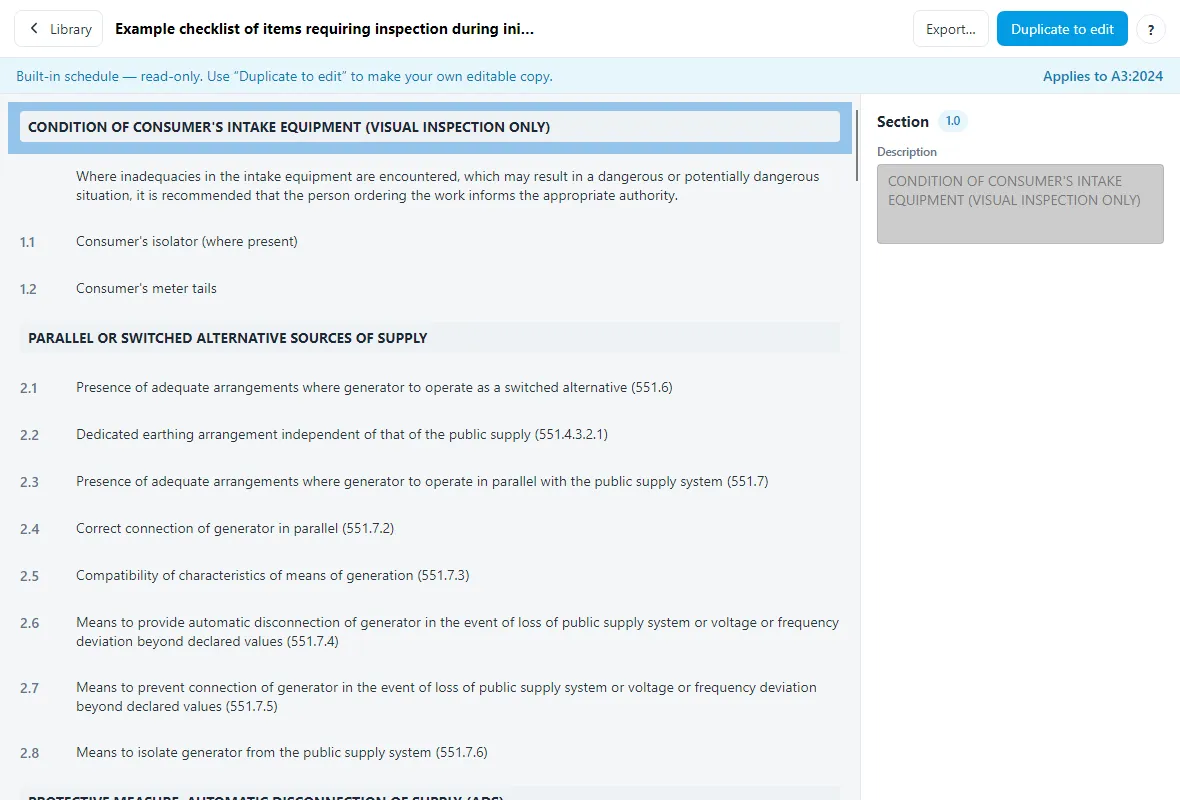
To adapt a standard schedule, use Duplicate to edit — on the card or inside the schedule. That makes an editable copy in your library (including its amendment tag) and opens it straight in the editor. The original stays untouched.
Creating and editing schedules
Create a schedule with New schedule, or open one of your own with Edit. The editor shows the schedule’s structure on the left and the details of the selected row on the right:
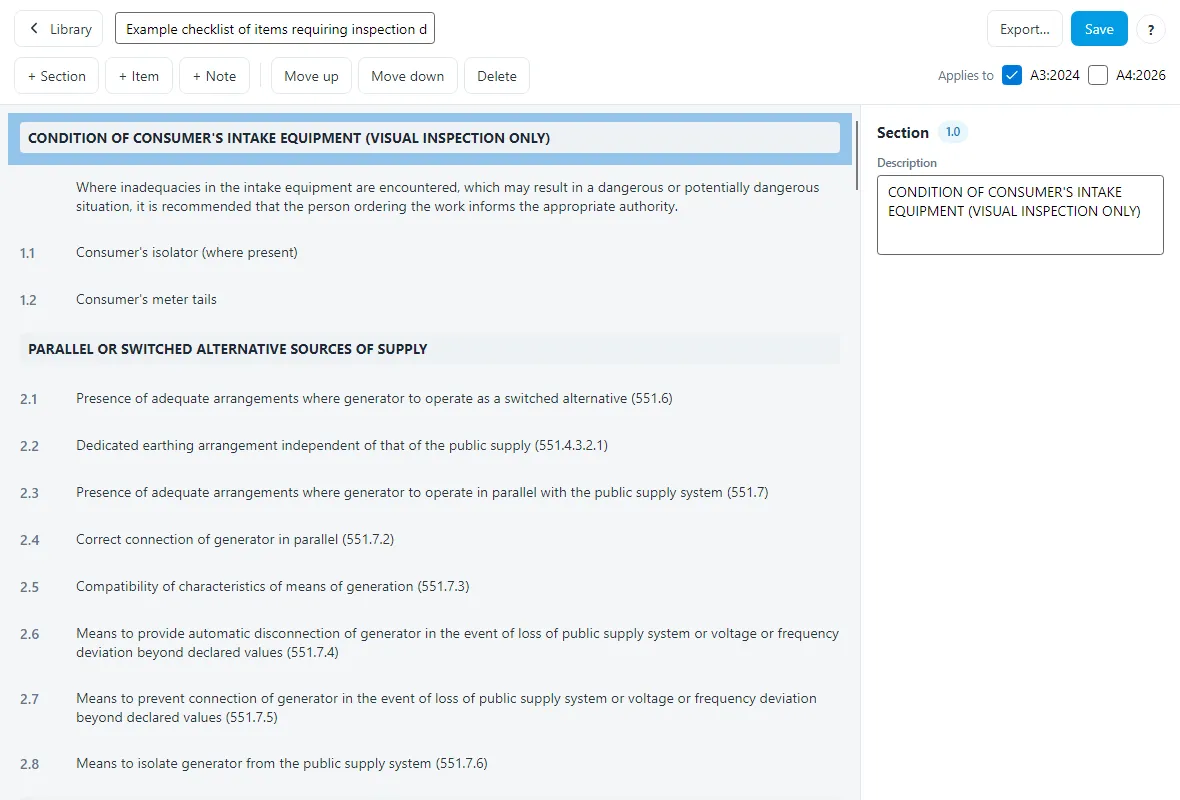
- Add rows with + Section, + Item and + Note. New rows are inserted after the selected row.
- Numbering is automatic. Sections become 1.0, 2.0…; items 1.1, 1.2…; sub-items 1.1.1, 1.1.2… Move rows with Move up / Move down and the numbering keeps itself right.
- Notes are un-numbered guidance lines shown between items — use them for reminders like “Record any access limitations in Section K.”
- The panel on the right edits the selected row: its description, an optional italic
sub-note, whether it’s an item or a sub-item, and an optional custom outcome list
(for example
Y, N/A) when an item shouldn’t use the standard outcome codes. - Applies to sets the schedule’s amendment tag — tick A3, A4, or both. This controls which new certificates offer the schedule (see below).
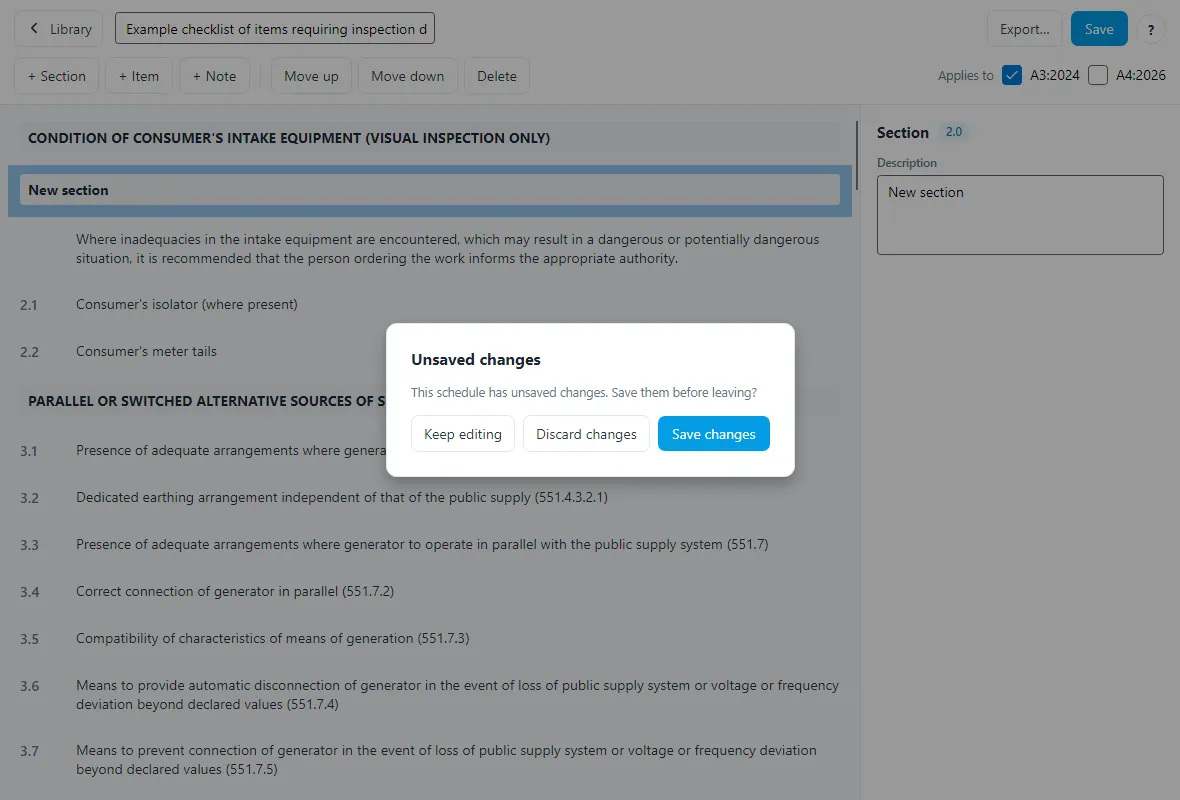
Press Save to keep your changes. If you leave a schedule — or close the window — with unsaved edits, the Schedule Manager asks what to do with them first:
Using a schedule on a new certificate
When you create a new EICR 2024 or EICR 2026, the New Certificate dialog has a Schedule drop-down. It offers the schedules that match that certificate’s amendment:
- An EICR 2024 offers the A3 standard schedules plus your custom schedules tagged A3.
- An EICR 2026 offers the A4 set plus your custom schedules tagged A4.
- Custom schedules with no amendment tag are offered for both, so nothing you made before tags existed goes missing.
The drop-down defaults to the standard residential schedule for that form, so if you don’t change anything the certificate starts exactly as it always has.
Sharing schedules
Schedules are single text files, one per schedule, so they’re easy to pass around:
- Export… (in the editor) saves a schedule as a
.pirform.schedule.txtfile you can email to a colleague. - Import… (on the home screen) brings a schedule file into your library as a new custom schedule. The amendment tag travels with the file.
You can also drop a schedule file directly into your library folder (Open library folder) and it appears in the Schedule Manager the next time it opens.