
Adding Photos to Electrical Certificates: A Complete Guide
A picture is worth a thousand words—especially when documenting electrical installation conditions. Pirform’s photo attachment feature makes it easy to capture, edit, and present photographic evidence directly in your Electrical Installation Condition Reports (EICRs) and Electrical Installation Certificates (EICs).
Why Photos Matter in Electrical Certificates
When inspecting electrical installations, you often encounter conditions that need visual documentation:
- Dangerous wiring configurations
- Non-compliant equipment
- Installation methods requiring remedial work
- Evidence of damage or deterioration
- Before and after comparisons
Adding photos to your certificates:
- Provides clear evidence - Visual proof of installation conditions
- Reduces disputes - Clients can see exactly what you observed
- Improves communication - Pictures clarify technical observations
- Supports recommendations - Visual justification for remedial work
- Creates complete records - Comprehensive documentation for future reference
Key Features
Pirform’s photo attachment system includes everything you need to document installations professionally:
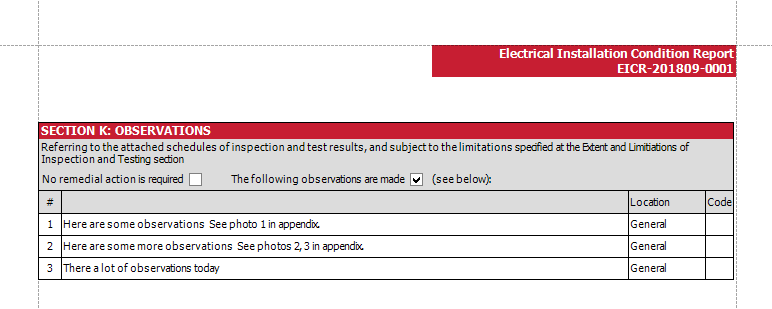
Attach Multiple Photos to Observations
Add one or more photos to any observation in your EICRs and EICs. Each photo can be linked to specific observations, making it easy for clients to see exactly what you’re referring to.
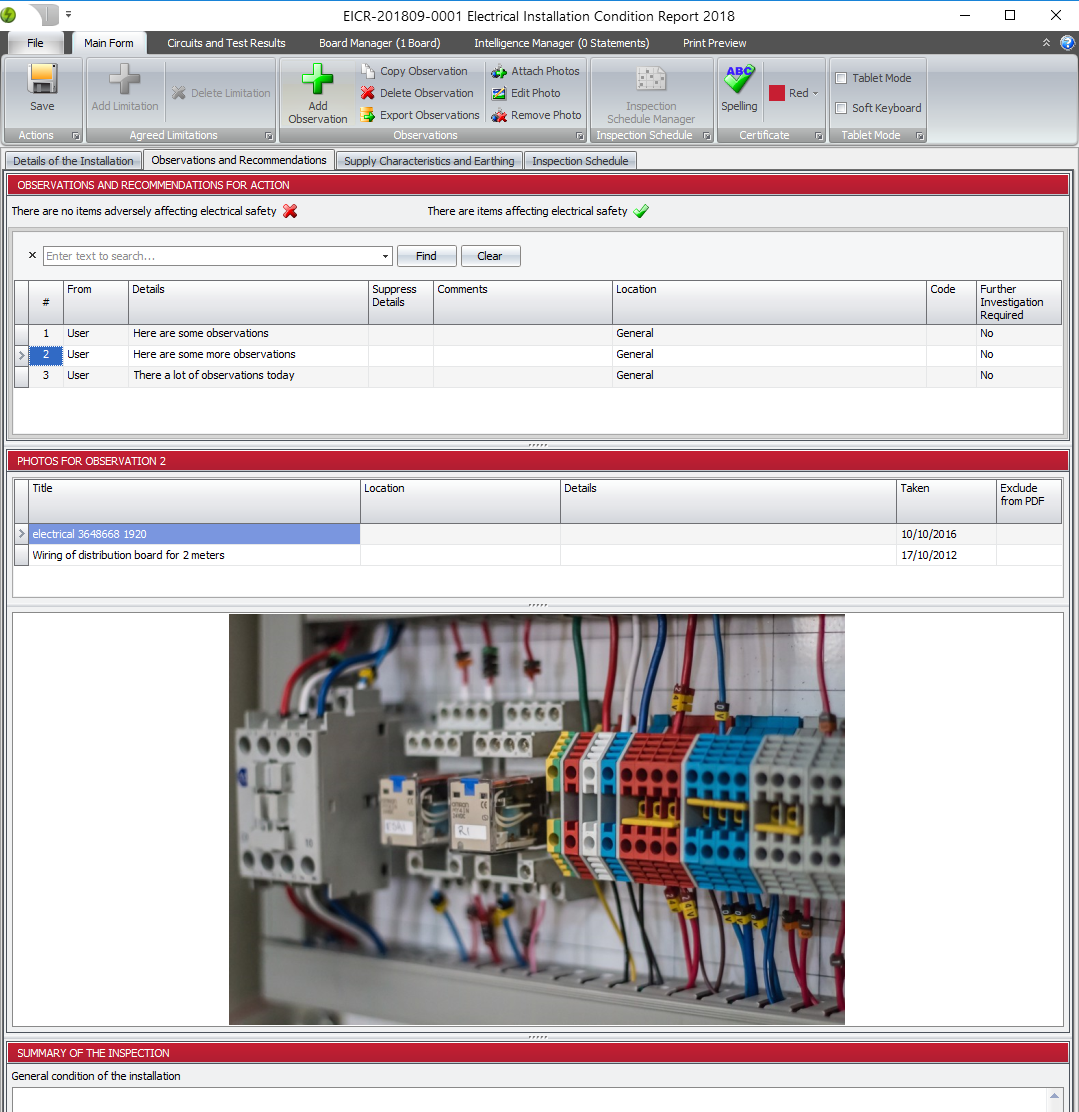
Smart Photo Information
When you attach a photo, Pirform automatically:
- Reads the title from the filename
- Extracts the date taken from the image metadata
- Pulls location information from GPS data (if available)
- Stores a clean copy without metadata for privacy
You can edit any of this information—title, location, description—to provide context specific to your inspection.
Built-In Photo Editor
Don’t let sideways photos or unnecessary background clutter your certificates. Pirform includes a photo editor that lets you:
- Rotate photos - Fix orientation issues with one click
- Crop images - Focus on the relevant detail
- Remove margins - Clean up whitespace from documents
- Reset to original - Undo changes if needed
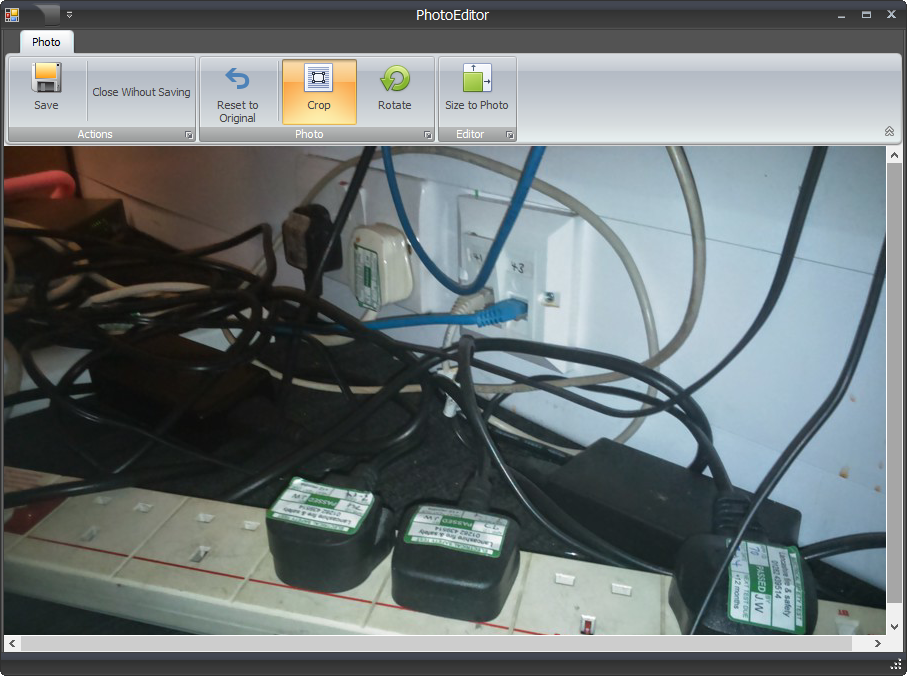
Simply double-click a photo or select Edit Photo from the ribbon to open the editor. Make your adjustments and click Save to update the certificate.
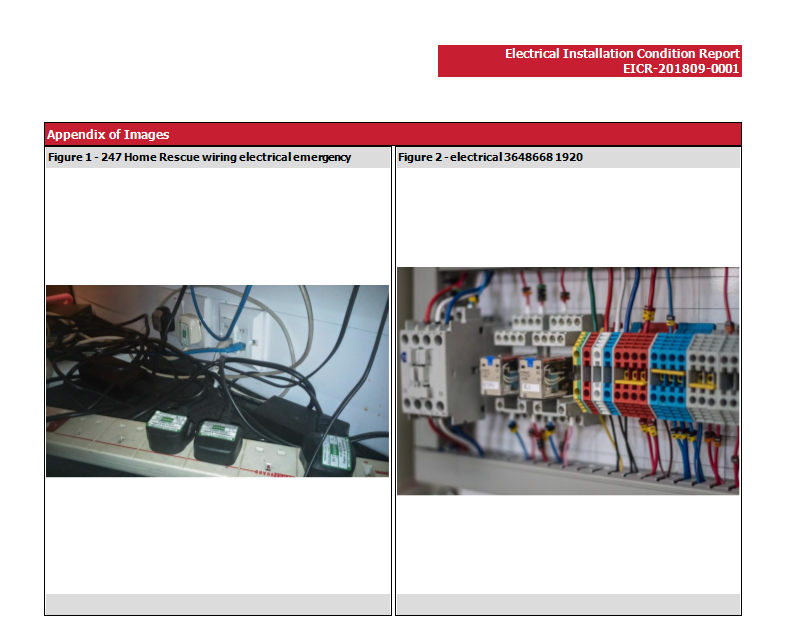
Automatic PDF Formatting
Pirform handles all the formatting automatically:
- Creates a professional photo appendix in your PDF
- Adds references in observations pointing to appendix photos
- Offers three print sizes (small, medium, large)
- Maintains image quality in printed certificates
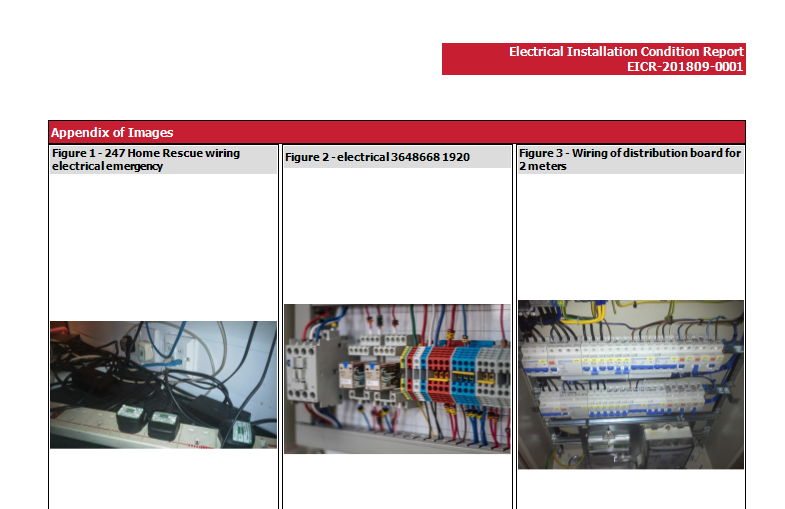
Clients see references like “See photos in Appendix A” directly in observations, making it effortless to find the related images.
How to Attach Photos
Method 1: Using the Ribbon
- Select the observation you want to attach photos to
- Click Attach Photos in the ribbon
- Select one or more images from your file system
- Review and edit photo information as needed
Method 2: Drag and Drop
The fastest way to add photos:
- Open your file explorer
- Find the photos you want to attach
- Drag them directly onto the observation
Pirform will automatically attach them and populate the metadata.
Working with Photo Appendices
Beyond observation photos, Pirform lets you create custom appendices containing:
- Photos - Installation images, equipment labels, board layouts
- PDF documents - Manufacturer specifications, test equipment certificates
- Word documents - Additional reports, correspondence, notes
Creating an Appendix
- Navigate to the Appendices section in your certificate
- Click Add Appendix
- Give it a descriptive title
- Click Add Attachment to add photos or documents
- Repeat to add multiple attachments to the same appendix
When you attach a PDF or Word document, Pirform automatically:
- Converts each page to an image
- Removes document margins
- Preserves your original file
You can attach both photos and documents to the same appendix. Pirform will arrange them in the order you added them.
Editing Photos After Attachment
Already attached a photo but need to adjust it? No problem.
To Crop a Photo:
- Open the photo editor (double-click or use Edit Photo)
- Ensure the Crop button is selected
- Drag over the area you want to show
- Click Save
To Rotate a Photo:
- Open the photo editor
- Click Rotate (rotates 90° anticlockwise)
- Repeat until the orientation is correct
- Click Save
To Remove Whitespace:
Perfect for scanned documents or PDFs with margins:
- Open the photo editor
- Click Crop Whitespace
- Pirform automatically removes surrounding whitespace
- Click Save
Controlling Photo Print Size
Pirform offers three photo print sizes:
- Small - 3 columns per page, ideal for overview shots
- Medium - 2 columns per page, balanced detail and coverage
- Large - 1 column per page, maximum detail for close-ups
You can set photo size:
- Per certificate - From Certificate Options
- As a default - From Pirform Options
Most users find medium size provides the best balance, but you can adjust based on the level of detail needed.
Best Practices
Take Clear, Relevant Photos
- Focus on the specific issue or condition
- Ensure adequate lighting
- Include context (e.g., show the board or room)
- Take multiple angles if helpful
Add Descriptive Information
- Update photo titles to be specific (e.g., “Damaged cable in kitchen consumer unit”)
- Include location details (e.g., “Ground floor distribution board”)
- Add descriptions explaining what the photo shows
Use the Editor Strategically
- Crop to highlight the relevant detail
- Rotate photos to correct orientation
- Remove distracting backgrounds when possible
Organize Appendices Logically
- Group related photos together
- Use clear appendix titles
- Consider creating separate appendices for different areas or issues
Privacy and Data Protection
Pirform takes privacy seriously:
- Removes metadata - GPS data, camera info, and other metadata are stripped from stored copies
- Preserves originals - Your original photos remain unchanged
- Secure storage - Photos are stored within your certificate file
This means you can safely share certificates with clients without exposing personal information embedded in photo metadata.
Common Questions
Can I attach photos to EICs as well as EICRs?
Yes! Photo attachment works with both EICRs and EICs (Electrical Installation Certificates).
What happens to my original photos?
Pirform stores a copy of each photo within the certificate file. Your original photos remain unchanged in their original location. You can safely delete or move them after attachment.
What file formats are supported?
Pirform supports all common image formats including JPG, PNG, BMP, and GIF. For document appendices, you can attach PDF and Word documents (.doc, .docx).
How many photos can I attach?
There’s no practical limit. You can attach as many photos as needed to document the installation properly. Keep in mind that more photos will increase PDF file size.
Can I remove a photo after attaching it?
Yes. Select the photo and use the delete or remove option in the ribbon to remove it from the observation or appendix.
What’s Next?
Photo attachments are just one way Pirform helps you create comprehensive, professional electrical certificates. To learn more:
- Read the complete Photos and Documents documentation - Full technical reference with videos
- Learn about Appendices - Adding documents to certificates
- Explore EICR Features - Complete guide to condition reports
Need Help?
Have questions about photo attachments or need assistance? Our support team is here to help. Contact us at support@shineforms.co.uk or visit our documentation for more guides and tutorials.